If you already know Python and you want to take your skills to the next level by creating amazing apps using Tkinter, then you have come to the right place. Today, we will build some apps with the Python skills that you already have.
You don’t need to be an expert in Python. Knowing how to write loops, conditional statements, functions, and some object-oriented concepts will do the job very easily.
Even if you don’t know Python, you can check out this article and learn it within a very little time. Then, you can learn object-oriented programming concepts by going through this article.
In this tutorial, you will learn everything about Tkinter by doing 3 complete projects. The 3 projects that we are going to do in this tutorial are Social Media Bookmark App, Age Calculator App, and Rock Paper Scissors Game.
Let’s dive right in.
Introduction
For most of the people who come to the field of programming, it is really likely that they will be stuck at one point.
Most resources out there on the Internet teach you the basics of a programming language, mainly the syntax of the language. But after that, they don’t teach you how to apply the theories and concepts into practice to make real software.
I also faced this problem. I learned Python language pretty easily and became familiar with the concepts of programming. But I didn’t know how to create software.
I could solve the common algorithmic problems, like sorting, finding the factorial of a number, etc. However, I was not confident about my programming skills.
After a few months, I decided to take an online course to create some projects. So, I bought a course on GUI development with Tkinter (GUI means graphical user interface).
To my surprise, it was so so easy to build an app with Tkinter. I created 3 Python apps and gained a lot of confidence in my programming skills.
In this tutorial, I will teach you how you can easily learn Tkinter and create three super-cool Python apps (step-by-step).
First of all, let me answer the obvious question asked by beginners who don’t know what Tkinter is.
What is Tkinter?
Tkinter is a graphical user interface (GUI) library in Python by which you can build GUI apps easily. It is Python’s standard GUI library.
You don’t need to install anything extra. Tkinter comes up with Python just kind of built-in, and you can write code in the Python IDLE itself.
If you already have Python in your system, that’s more than enough. Tkinter is already present in your Python in standard Linux, Microsoft Windows, and Mac OS X.
Creating your first GUI with Python
Now you know what Tkinter is, and you have Python installed in your system. That means you are ready to start building apps. So, let’s begin the coding part.
Importing the Tkinter library
To use the Tkinter library, we first need to import it using the ‘import’ keyword.
import tkinterWe can import it in this way too so that we can use tk instead of tkinter in our program.
import tkinter as tkCreating a window
Now, let’s see how we can create a simple window in Python. Let’s look at the code first.
import tkinter as tk
window = tk.Tk()
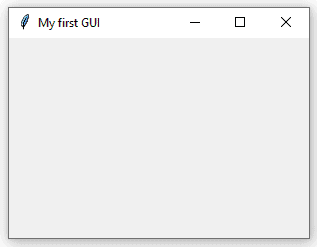
window.title("My first GUI")
window.geometry("300x200")
window.mainloop()Run the code. These five lines of Python are enough to create a simple GUI window.
Now let’s see what each line is.
The first line imports the Tkinter library into your code. The second line initializes a Tk object, called window. The third line sets a title for the window. The fourth line sets the width and height of the window.
Finally, the last line just creates the whole window to execute. You need to call the mainloop() method just before you run any Tkinter application. So, that is a line we will use at the end of every Tkinter program that we write.
Now, we have a window of size 300×200. Now, let’s try to print something on it. For that, you need to learn what a label is.
Label
A label is a class in Tkinter which is used to display text or image. It is a widget that the user can only view. The following is the syntax of a label:
label_name = tk.Label(text ="some text")
label_name.grid(column=0,row=0)
The Label method takes a keyword argument. We can tell what text to be displayed as the value of the argument.
A grid is used to label at a position using row and column values, that is, to tell the program where the label should be positioned. Now, let’s print something on our window using a label.
import tkinter as tk
window=tk.Tk()
window.title(" My Favorite Sports Player ")
window.geometry("300x200")
mylabel = tk.Label(text = "I love watching Virat Kohli play cricket ")
mylabel.grid(column=0,row=0)
window.mainloop()
When we run this code, we will get a window like this.
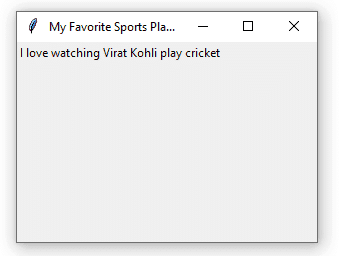
Note that, when there are no other things in the window, even if we change the values of column and row, the position of the label doesn’t change. The text will still stick to the top left of the window.
Now, let’s see how we can create a button.
Buttons
To create a button, we use the following syntax:
button_name = tk.Button(window, text = "some text")
button_name.grid(column=1,row=0)
We use window as the first argument of the Button method, to connect the button to our window.
Now, we know how to create a button. But how to make it work? In order to make the button work, we need to handle events (like clicking a button). Let’s see how we can handle events.
To handle events, we first need to create an event function. The function takes the event as an argument. The second thing is we need to bind the button to the event.
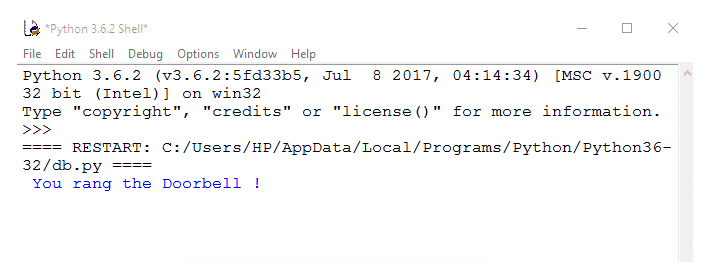
Let’s try an example to see how we can do these. We will create a doorbell app. When you click the button, it will print ‘You rang the doorbell’ on the window.
import tkinter as tk
def doorbell(event):
    print(" You rang the Doorbell !")
window = tk.Tk()
window.title(" Doorbell App")
window.geometry("300x200")
mybutton = tk.Button(window, text = "Doorbell")
mybutton.grid(column=1,row=0)
mybutton.bind("<Button-1>",doorbell)
window.mainloop()
We have an event function called doorbell, which takes in an event as the argument and performs the print operation whenever it receives the argument.
We made a button called mybutton. Then, we bound it to the window of the app using the bind method. The bind method has two parameters.
The first parameter <Button-1> is the left click short key of the mouse. When you left-click the button with the mouse, then the event occurs. The second parameter is the name of the event function.
Now, let’s run the code.

So, whenever we click the button, it will print ‘ you rang the doorbell ‘ on the Python shell or command line.
Project 1: Bookmark App
Now, you know the basics very well. It’s time to begin our project. We will create a social media bookmark app in this project. The app consists of 2 buttons which are Facebook and LinkedIn. When I click on these buttons, it loads my corresponding social media page.
So, let’s start building it.
First of all, we need to import two libraries, our very own favorite tkinter library and webbrowser library to browse websites.
import tkinter as tk
import webbrowser
Now, we will create 2 functions, each for opening your LinkedIn and Facebook profiles. You can open these pages on a new tab in your browser, thanks to open_new_tab(‘URL’) method of webbrowser library.
def linkedin(event):
    webbrowser.open_new_tab(' put your linkedin profile link here ')

def facebook(event):
    webbrowser.open_new_tab(' put your facebook profile link here ')
Now, let’s create a window for our app and name it as ‘Social Media Bookmark App’.
window=tk.Tk()
window.geometry("300x200")
window.title("Social Media Bookmark App")
Let’s create a label to add some text to our app.
label1=tk.Label(text="My Social Media")
label1.grid(column=0,row=0)
You can also style your fonts in the label in the following way if needed.
label1 = tk.Label(text = "My social Media", font=("Times new roman",20))Now, create 2 buttons each for LinkedIn and Facebook. Arrange them using the ‘grid’ method. Note that I used different colors for the buttons. We can color the button using ‘bg‘ argument.
button1=tk.Button(window,text="Linkedin",bg="orange")
button1.grid(column=1,row=1)
button2=tk.Button(window,text="Facebook",bg="pink")
button2.grid(column=3,row=1)
We will bind these buttons to their corresponding functions using the ‘bind’ method.
button1.bind("<Button-1>",linkedin)
button2.bind("<Button-1>",facebook)
Finally, let’s run everything inside the window using ‘mainloop()’ method.
window.mainloop()That’s it.
Here is the complete code for the project.
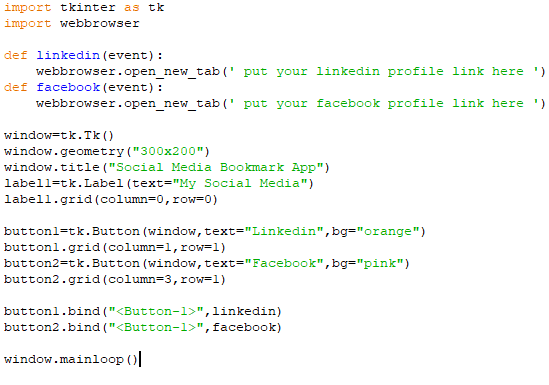
The GUI of our app would look like this.

That’s it. We have coded our first project completely.
Now, let’s learn about widgets in Tkinter.
Widgets in Tkinter
The basic widgets in Tkinter are frames, labels, buttons, check buttons, radio buttons, entries, and combo boxes.
Syntax of Widgets
The basic syntax of widgets is:
tk.Widget_name(parent,options) This is the common pattern used by all the widgets. We can use the following widgets in a similar way.
1.Entry
Entry fields are used to get some inputs.
For example:
tk.Entry(parent,width=25)2.Button
Buttons are used to make some events.
For example:
tk.Button(parent, text="Click Here")3.Checkbutton
It is used to check some conditions and terms.
Let’s see an example:
tk.Checkbutton(parent,text="Remember me",variable=tk.IntVar())4.Label
It is used to display some text or images.
For example:
tk.Label(text="Hello world")5.OptionMenu
It is used to select an option from a drop-down menu.
For example:
tk.OptionMenu(parent,tk.IntVar(),"Age","15+","25+","40+")6.Scrollbar
It is used to scroll the app.
For example:
tk.Scrollbar(parent,orient=tk.VERTICAL)7.Radiobutton
It is used to provide multiple options in which only one of them can be selected.
Let’s see an example:
tk.Radiobutton(parent,text="Male",variable=tk.IntVar(),value=5)8.Text
It is used to add text and print them on the GUI. Look at this example:
tk.Text(parent,height=20,width=10)There are some more widgets available like the list box, progress bar, scale, spinbox, etc. You can learn more about widgets here.
pack and grid
We can arrange the widgets using the pack() method instead of the grid(). The problem with pack() is that it packs things as close as possible. You can’t even give space or change the rows and columns, or change the order of widgets. That is why pack() is not often used, instead, grid() is used mostly.
Connecting Entries with Buttons
We can connect a button with entries using the keyword command and assign it a function name.
button = tk.Button(text="click",command=function_name)Also, we can get the value from the entry using the get() method.
For example: name_entry.get()
Enough of the theory lessons. Let’s build something awesome, very awesome. Get ready to have fun, because we are going to create an age calculator using Python with a cool user interface.
Project 2: Age Calculator App Using Python Tkinter
We will be creating an app in which the user can type in his date of birth and the app will calculate his age and print it.
First things first, we need to import 3 libraries. The first one is the obvious one, which is tkinter. Then, we need datetime library to work with dates. Finally, we need PIL library which will help us to work with images.
import datetime
import tkinter as tk
from PIL import Image,ImageTk
Now, let’s create a window for our app and name it as ‘Age Calculator App’.
window=tk.Tk()
window.geometry("620x780")
window.title(" Age Calculator App ")
Now, we are going to create 4 labels, each for the name, year, month, and date, and put them in the grid.
name = tk.Label(text = "Name")
name.grid(column=0,row=1)
year = tk.Label(text = "Year")
year.grid(column=0,row=2)
month = tk.Label(text = "Month")
month.grid(column=0,row=3)
date = tk.Label(text = "Day")
date.grid(column=0,row=4)
For all the labels created, we will create corresponding entry fields in order to get the user inputs. Put them on the right side of corresponding labels using ‘grid’ method.
nameEntry = tk.Entry()
nameEntry.grid(column=1,row=1)
yearEntry = tk.Entry()
yearEntry.grid(column=1,row=2)
monthEntry = tk.Entry()
monthEntry.grid(column=1,row=3)
dateEntry = tk.Entry()
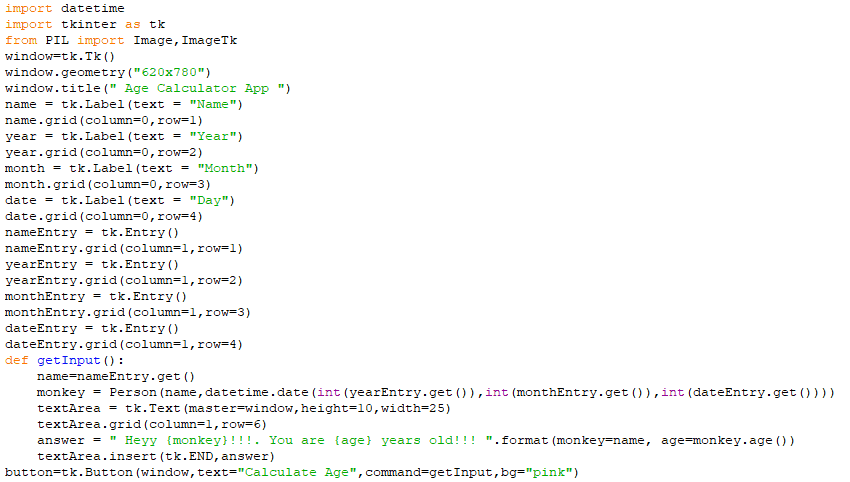
dateEntry.grid(column=1,row=4)Let’s define a function to get the user inputs, called getInput(). Inside that, we create an object of the ‘Person‘ class (which will be defined later) and pass the name and birth date to ‘__init__‘ method of that class.
Note that we use the predefined ‘int()’ method to convert values into integer format. Then, we create a text area that will display the age of the user as output.
def getInput():
    name=nameEntry.get()
    monkey = Person(name,datetime.date(int(yearEntry.get()),int(monthEntry.get()),int(dateEntry.get())))
    textArea = tk.Text(master=window,height=10,width=25)
    textArea.grid(column=1,row=6)
    answer = " Heyy {monkey}!!!. You are {age} years old!!! ".format(monkey=name, age=monkey.age())
    textArea.insert(tk.END,answer)
I don’t know why did I call my variable monkey. Just randomly came out of my mind. However, you can try a different name which is a good name.
Now, we will create a button for the user to submit his/her input values. We link the button to our ‘getInput‘ function.
button=tk.Button(window,text="Calculate Age",command=getInput,bg="pink")
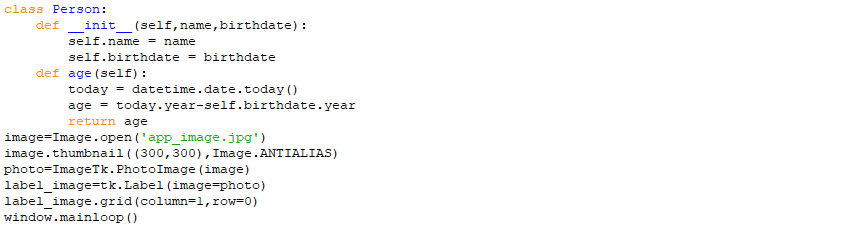
button.grid(column=1,row=5)Now, let’s define the ‘Person’ class. Define the __init__ method and also the ‘age‘ method which will calculate the age of the user by subtracting the user’s birth date from today’s date.
class Person:
    def __init__(self,name,birthdate):
        self.name = name
        self.birthdate = birthdate
    def age(self):
        today = datetime.date.today()
        age = today.year-self.birthdate.year
        return age
Now, we are going to add an image to our app so that it will look beautiful. You have to place the image in the same folder as that of the Python file.
image=Image.open('app_image.jpeg')
image.thumbnail((300,300),Image.ANTIALIAS)
photo=ImageTk.PhotoImage(image)
label_image=tk.Label(image=photo)
label_image.grid(column=1,row=0)
Don’t forget to change the image name accordingly.
Finally, let’s run everything inside the window using ‘mainloop()’ method.
window.mainloop()That’s it. Here is a quick look at the entire code.
When we run the code, the user interface of the app will look like this.

We can add beautiful images to our Tkinter app to make its user interface looks cool and attractive. To implement this, we need a library called ‘PIL’. If you don’t have this amazing library already, go to your command prompt or PowerShell, and type in:
easy_install Pillowand press enter.
This will give some amazing superpower to your programming fingers.
After installing PIL, you can create your python desktop apps more efficiently. An example code to help you use PIL is given below.
from PIL import Image,ImageTk  #import PIL library
image = Image.open('Path' )     #specify the path of the image
image.thumbnail((100,100),Image.ANTIALIAS)    #100,100 is the resolution
#ANTIALIAS helps to deal some problems while using images
photo= ImageTk.PhotoImage(image)   #converts the image to a tkinter image
label_image= tk.Label(image=photo)  #stores the image in a label
label_image.grid(column=1,row=0)    #Puts it in a grid
You can boost the beauty of your Tkinter apps with these few lines of code.
Now, it’s time to create a game, a rock paper scissors game in which you can play against the computer. Let’s do it. Making games is not rocket science. It is pretty simple.
Project 3: Rock Paper Scissors Game using Python Tkinter
Let’s build a Rock Paper Scissors game (also called Stone Paper Scissors game) in Python using the Tkinter library.
In this game, you are going to play against your enemy which is the computer. I hope you already know what the game is all about since it is a famous game around the world. In my place, the game is popularly known as Stone-Paper-Scissors and is played very often by the children using their hands.
In case if you don’t know what the Rock Paper Scissors game is, it is a game with three choices, rock, paper, and scissors. Two players can play this game, in our case, the user and the computer. Each one has to make a choice from the three.
If rock and scissors come, rock wins. If rock and paper come, paper wins. If paper and scissor come, scissor wins. If both the choices are the same, then no one will win. Both the user and the computer will not get a point.
Without any further introduction, let’s jump right into coding our game.
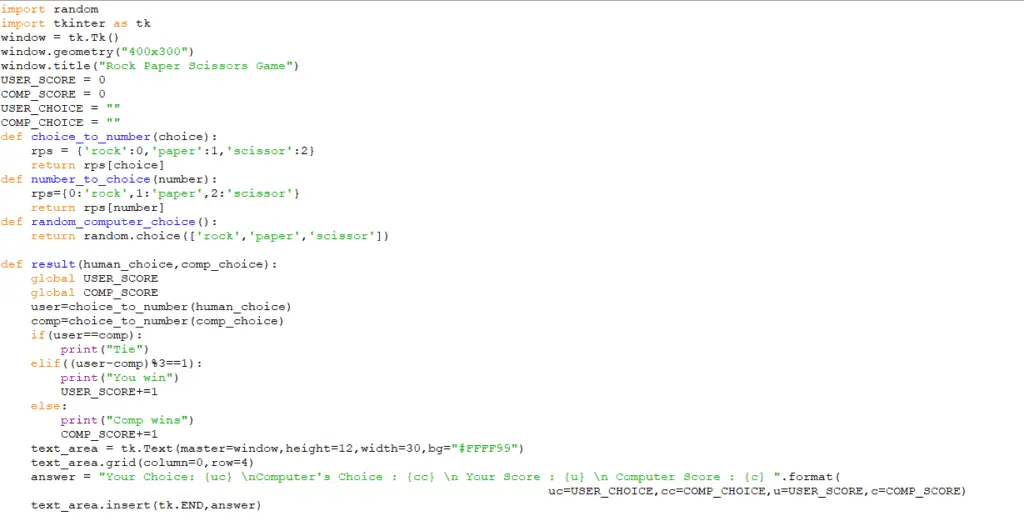
First of all, we need to import random and Tkinter libraries into our code.
import random
import tkinter as tk
Now, let’s create a window for our game and name it ‘Rock Paper Scissors Game’.
window = tk.Tk()
window.geometry("400x300")
window.title("Rock Paper Scissors Game")
Now, we are going to define the global variables that we are going to use in our program. We have four of them for storing the user’s score, computer’s score, user’s choice, and computer’s choice. We initialize both scores as 0.
USER_SCORE = 0
COMP_SCORE = 0
USER_CHOICE = ""
COMP_CHOICE = ""
Let’s define two methods for converting the user’s choice to a number and vice versa.
def choice_to_number(choice):
    rps = {'rock':0,'paper':1,'scissor':2}
    return rps[choice]
def number_to_choice(number):
    rps={0:'rock',1:'paper',2:'scissor'}
    return rps[number]
Now, let’s create a function to get the computer’s choice. We use the ‘random’ library here. The computer selects a random choice from either rock, paper, or scissors.
def random_computer_choice():
    return random.choice(['rock','paper','scissor'])
Now, we are going to create the most important function in our code, the ‘result’ function that determines the winner. This function evaluates both users’ and computer’s choices and based on the comparisons, it picks a winner and updates the scores.
Also, let’s create a text area for displaying the current choices and current scores of both the user and the computer.
def result(human_choice,comp_choice):
global USER_SCORE
global COMP_SCORE
user=choice_to_number(human_choice)
comp=choice_to_number(comp_choice)
if(user==comp):
print("Tie")
elif((user-comp)%3==1):
print("You win")
USER_SCORE+=1
else:
print("Comp wins")
COMP_SCORE+=1
text_area = tk.Text(master=window,height=12,width=30,bg="#FFFF99")
text_area.grid(column=0,row=4)
answer = "Your Choice: {uc} \nComputer's Choice : {cc} \n Your Score : {u} \n Computer Score : {c} ".format(uc=USER_CHOICE,cc=COMP_CHOICE,u=USER_SCORE,c=COMP_SCORE)
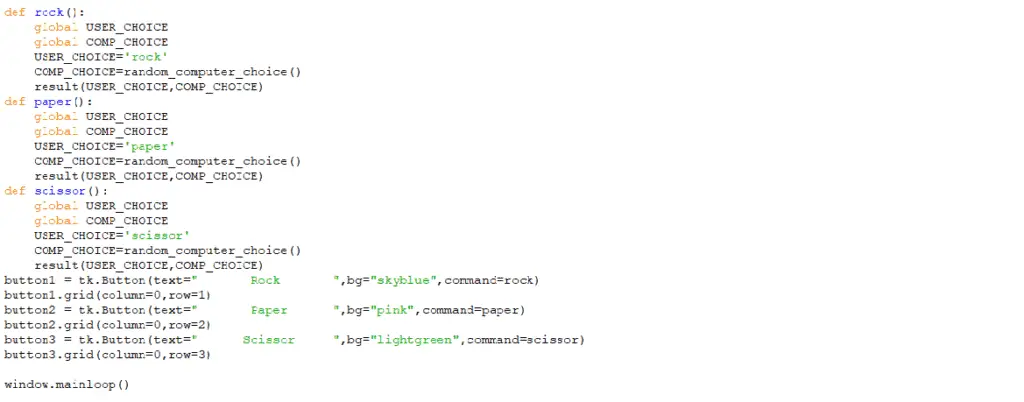
text_area.insert(tk.END,answer)Now, let’s define three methods for the 3 different user choices. These methods take the user’s choice, generate a computer’s random choice, and pass both into the ‘result’ function that we created previously.
def rock():
    global USER_CHOICE
    global COMP_CHOICE
    USER_CHOICE='rock'
    COMP_CHOICE=random_computer_choice()
    result(USER_CHOICE,COMP_CHOICE)
def paper():
    global USER_CHOICE
    global COMP_CHOICE
    USER_CHOICE='paper'
    COMP_CHOICE=random_computer_choice()
    result(USER_CHOICE,COMP_CHOICE)
def scissor():
    global USER_CHOICE
    global COMP_CHOICE
    USER_CHOICE='scissor'
    COMP_CHOICE=random_computer_choice()
    result(USER_CHOICE,COMP_CHOICE)
Now, let’s build 3 buttons so that the user can click them and play the game.
button1 = tk.Button(text="    Rock    ",bg="skyblue",command=rock)
button1.grid(column=0,row=1)
button2 = tk.Button(text="    Paper    ",bg="pink",command=paper)
button2.grid(column=0,row=2)
button3 = tk.Button(text="    Scissor    ",bg="lightgreen",command=scissor)
button3.grid(column=0,row=3)
Finally, let’s run everything inside the window using ‘mainloop()’ method.
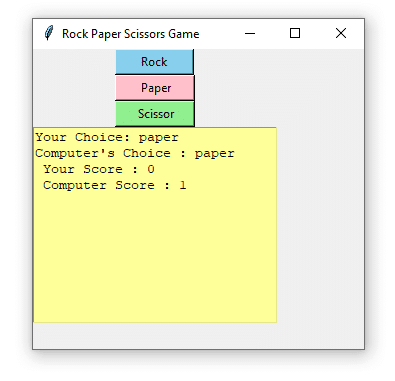
window.mainloop()After you copy-pasted all the above code in the correct order, run this on your IDLE or command line. Then you will get an interface with three buttons, Rock, Paper, and Scissor. You can then click any of those buttons to start the game.
Just after you click your choice, the computer will select its own random choice. The functions of our code will compare both the choices and give the point to the winner of that round.
Let’s do a quick look at the complete Python code for our rock paper scissors game.
After running our code, our game’s user interface looks like this.
That’s it. Now, play the game and enjoy. Also, show your game to your friends and loved ones.
How to Convert a Python Program to EXE File?
We have made 3 amazing projects. After making some beautiful code we may often wonder how it can be converted to an EXE file so that we don’t need to go to the command line or IDLE to run the code.
If the program is like an application that runs on one or two clicks, it would have been pretty cool, right?. Let’s see how we can do this thing and build some software or application with our python code.
py2exe for Python
There is a software called py2exe for this purpose. You can download the software and it will make your life much easier. But, if you want to do it on yourself, without using any third-party software, then follow along with this tutorial.
Converting .py to .exe without using py2exe
For that, we first need to install Pyinstaller library. If it is not already installed, go to the PowerShell or CMD and type in the following command.
pip install pyinstallerOnce we have done that, go to the directory in which the python file is located, using the ‘cd’ command. After that, type in :
pyinstaller -F -w file_name.py Use the name of your file instead of file_name.py in the above command. Then, some folders will be automatically created and we will have an executable file inside the ‘dist’ folder.
How to add an icon to Python software?
We can add an icon to our app to make it look much more real. For that, you need to have an icon of type ‘ .ico ‘ ready to use. You can download an icon from the internet that is suitable for your app.
To add an icon to the executable file, type in :
pyinstaller -F -w -i icon_name.ico file_name.py That’s it. If you have followed these steps, your executable python app will be ready to rock and roll.
A Tkinter Course That You Might Need
I have tried my best to create this article to help you learn Tkinter. If you think you want to go a little deeper and build some more applications like the Snake Game, Pomodoro Timer, and Chat App, I can recommend a course for you.
The “GUI Development with Python and Tkinter” course on Udemy is a great course and costs only a few bucks. If you want to level up your skills with Python and Tkinter, check out this course.
Conclusion
Finally, we have mastered the basics of the Tkinter library of Python and completed three projects. If you have any doubts regarding this tutorial, feel free to ask them in the comments section down below.
I’ve kept the complete source code of these three apps in my GitHub repository. You can find it here.
If you want some more Tkinter project ideas and tutorials, I’ve written an article on 8 Fun Python Tkinter Project Ideas. Check it out!
My motivation for creating this article was to show you how easy it is to create apps and software, especially with Python.
You must realize that mastering Tkinter will not land you any job. No real-world companies create software using Tkinter.
But, this was a confidence booster. This tutorial was created to show you that you can create apps with ease.
I know, after doing these projects, your confidence in programming would be much higher than it was before.
Now, it’s time to take action. You can now move on to more advanced fields like machine learning, web development, etc. I hope you will do so.
I spent a long time making this article. I would appreciate it if you would be willing to share it. It will encourage me to create more useful tutorials like this.
Happy coding!
39 thoughts on “Tkinter: A Helpful Illustrated Guide With 3 Projects”
Leave a Reply to Jesse Cancel reply
Recent Posts
Modular programming is a software design technique that emphasizes separating the functionality of a program into independent, interchangeable modules. In this tutorial, let's understand what modular...
While Flask provides the essentials to get a web application up and running, it doesn't force anything upon the developer. This means that many features aren't included in the core framework....

Woooooow ????
Really I don’t know what to say to you, it’s amazing!!!
It’s NOT how I thing it(programming),
It’s very coooooool!
Really I WOULD thank you for your beautiful effort. Now I AM a professional programmer ????????????
THANK YOU Ashwin Joy.
Cheers man. Keep going!
How do I configure my computer to be able to act as a server (host) for my second computer using crossover?
I don’t know bro. I haven’t done anything like that.
Maybe use a docker container or a VM running a different process
Thank you soo much!!
Your article was very helpful .
Cheers ????
You are a great programmer sir
Thanks man 🙂
Let me appreciate you Ashwin for your excellent article and tutorial. It was very simple and easy. As I am a tutor myself I am always searching for simple and easy ways of coding.
Thanks for the comment. I’m happy to help you 🙂
Pillow is a fork of PIL and basically replaced it because I can’t even find PIL on pip install website.
Pillow has a Image and ImageTk Module (as PIL has/had), I haven’t look if they do the same as in PIL.
Really helpful article I will continue with 8 Fun Python Tkinter Project Ideas tomorrow.
you’ve made wonderful job!!!!
i found this article very interesting and i got the content i am searching for.Thanks for sharing your knowledge …cheers????
Thanks 🙂
Dear Ashwin,
I really appreciate your write up, am new to programming and I want to write exam/quiz app, working with list inside my code is working properly but to convert them tp txt or csv file is the challenging I am facing
I will be grateful if you could be my mentor.
Best wishes with your project. Programming is all about problem-solving. Keep trying and learning. You’ll be able to complete your project.
in that age calculator program there is no single error in program but after running the program it doesnt show any window output
thank you 대답
Can anyone help?
When I enter:
pyinstaller -F -w file_name.py
Into the command prompt
To covert the file I get the error message
“‘pyinstaller’ is not recognised as an internal or external command, operable program or batch file”
That is because you didn’t install pyinstaller. Try to install it using pip install pyinstaller.
Good day! This is kind of off topic but I need some advice from an established blog. Is it hard to set up your own blog? I’m not very techincal but I can figure things out pretty fast. I’m thinking about setting up my own but I’m not sure where to begin. Do you have any ideas or suggestions? Thank you
It is very easy to set up your own blog. I recommend using WordPress for blogging. You can check out YouTube channels like Income School, WP School, WP Eagle, Carl Broadbent, Niche Safari, Shaun Marss, and other tutorials for reference.
can anyone please explain this logic [elif((user-comp)%3==1): print(“You win”) USER_SCORE+=1].this logic is in paper-scissor-rock project.
In the choice_to_number() method, each choice is given a score associated with it (0, 1, and 2). Take a few possible conditions and put the corresponding values in (user-comp)%3==1 condition. See this example:
[0, 1, 2]
[r, p, s]
Situation 1
————
rock vs scissors
(rock – scissors) % 3 == 1
(0 – 2) % 3 == 1
(-2) % 3 == 1
1 == 1
rock wins (user)
Situation 2
——————
paper vs scissors
(paper – scissors) % 3 == 1
(1 – 2) % 3 == 1
2 == 1
scissor wins (computer, since the condition is not met)
Situation 3
————
paper vs rocks
(paper – rocks) % 3 == 1
(1 – 0) % 3 == 1
1 % 3 == 1
1 == 1
paper wins (user)
Similarly, you can check the other situations.
Brilliant tutorial, my man!
Cheers dude
That’s nice. Ashwin Joy is my Python Boss surely, that’s great!
Haha, Thanks mate!
Very serious and plentiful thank yous! Clear and really fun to walk thru.
Cheers
omg thank you so much. becos of u, i could code my first python game !
thank u sooooo much :))))))))))))
Glad that I could help you. Keep going, man.
Hi there! Quick question that’s totally off topic. Do you know how to make your site mobile friendly? My blog looks weird when viewing from my iphone 4. I’m trying to find a theme or plugin that might be able to resolve this issue. If you have any suggestions, please share. Cheers!
I think most of the WP themes are responsive. I’m using Acabado, which is a premium theme. If you want a free theme that is responsive, Astra is a good one. Also, you can customize your pages using page builders like Elementor.
Style, typography, shot, icons – classic!!
can we make something like belarc advisor software to get all the details of computer system like List of hardware along with make and model and also list of software installed with serial key if available using python desktop application
It is beatiful !!!
:p
wow, quiet helpful
but can a know something about integrating auto API’s in the app making
please guide
Pasted below is my variation of the code. How would you suggest I resolve my issue where my score only counts up to 1?
#*****************************************************************************
# Problem 1 Statement
“””
Prob. 1. Implement the “Rock-Paper-Scissor” game using Tkinter. GUI/App should have the following:
3 buttons, representing the user’s Rock, Paper, and Scissors selection. You can have an image on the buttons as well.
Label to keep track of the score for both computers as well users.
Label to inform who won and computer selection
Restart/Reset button to restart the game and reset the score.
Make sure to have the widget’s proper width, height, and layout. Choose any color scheme and layout manager.
“””
#*****************************************************************************
# Problem 1 Code
# importing the neccesary modules
import tkinter as tk
import tkinter.font as tkFont
import random
from random import randint
# create the main mindow for your GUI
window = tk.Tk()
Button =tk.Button()
# create the Font Global variables for entire program
title_font = tkFont.Font(family=”Courier”, size=20, weight=’bold’, slant=’roman’, underline=0, overstrike=0)
button_font = tkFont.Font(family=”Courier”, size=10, weight=’bold’, slant=’roman’, underline=0, overstrike=0)
label_font = tkFont.Font(family=”Courier”, size=12, weight=’bold’, slant=’roman’, underline=0, overstrike=0)
app_font = tkFont.Font(family=”Courier”, size=11, weight=’bold’, slant=’roman’, underline=0, overstrike=0)
# create the name for the window (located in the title bar)
window.title(“ME 480 – Rock-Paper-Scissor”)
# adjust the opacity of the window
#window.attributes(“-alpha”,0.6)
# create the defined dimensions of the GUI window
window_width = 650
window_height = 650
window.geometry(f'{window_width}x{window_height}’)
# focus the GUI window
window.attributes(‘-topmost’, True)
# Set the background color of the window
window.config(bg=”light gray”)
# Get the display dimensions
screen_width = window.winfo_screenwidth()
screen_height = window.winfo_screenheight()
# find the center point
center_x = int(screen_width/2 – window_width/2)
center_y = int(screen_height/2 – window_height/2)
# set the GUI posintion to the center of the display medium
window.geometry(f'{window_width}x{window_height}+{center_x}+{center_y}’)
window.geometry(f'{window_width}x{window_height}’)
# Create the Frames for the App Widgets/labels/buttons
canvas = tk.Canvas(window, width=350, height=450, bg = ‘white’, highlightbackground = ‘black’,
highlightthickness = 2)
#canvas.pack(anchor=tk.CENTER, expand=True)
canvas.grid(column = 0, row= 0, sticky=tk.N+tk.S+tk.W+tk.E)
# Create the Frames for the App Widgets/labels/
sizing = tk.N+tk.S+tk.W+tk.E
frame = tk.LabelFrame(canvas, text = “Game Interacive Window and Commands”, padx = 5, pady = 5,bg = ‘white’,
highlightbackground = ‘blue’,highlightthickness = 2)
frame.grid(column = 0, row = 0, sticky=tk.N+tk.S+tk.W+tk.E)
#*****************************************************************************
# Global Variables
CHOICE = [“Rock”, “Paper”, “Scissors”] #choice[0],choice[1],choice[2]
computer_win_log = 0
player_win_log = 0
#*****************************************************************************
# Functions
def play_game(player_choice, computer_choice):
global computer_win_log
global player_win_log
p_log = player_win_log
c_log = computer_win_log
user = player_choice
computer = computer_choice
# game win/loss conditions
if user== “Rock” and computer == “Scissors”:
game_commentary.config(text=”Player Wins!”)
p_log =+ 1
player_score.config(text=str(p_log))
elif user == “Paper” and computer == “Rock”:
game_commentary.config(text=”Player Wins!”)
p_log =+ 1
player_score.config(text=str(p_log))
elif user == “Scissors” and computer == “Paper”:
game_commentary.config(text=”Player Wins!”)
p_log =+ 1
player_score.config(text=str(p_log))
#computer wins rules
elif user == “Rock” and computer == “Paper”:
game_commentary.config(text=”Computer Wins!”)
c_log =+ 1
computer_score.config(text=str(c_log))
elif user == “Paper” and computer == “Scissors”:
game_commentary.config(text=”Computer Wins!”)
c_log =+ 1
computer_score.config(text=str(c_log))
elif user == “Scissors” and computer == “Rock”:
game_commentary.config(text=”Computer Wins!”)
c_log =+ 1
computer_score.config(text=str(c_log))
#stalemate rules
else:
game_commentary.config(text=”Stalemate!”)
#player_score.config(text=str(p_log))
#computer_score.config(text=str(c_log))
#print(“Computer Score: “, c_log,”Player score: “, p_log)
#return c_log, p_log
def rock_choice():
global CHOICE
player_choice = CHOICE[0]
computer_choice = CHOICE[randint(0,2)]
play_game(player_choice, computer_choice)
def paper_choice():
global CHOICE
player_choice = CHOICE[1]
computer_choice = CHOICE[randint(0,2)]
play_game(player_choice, computer_choice)
def scissors_choice():
global CHOICE
player_choice = CHOICE[2]
computer_choice = CHOICE[randint(0,2)]
play_game(player_choice, computer_choice)
def reset_game():
player_score.config(text=’0′)
computer_score.config(text=’0′)
game_commentary.config(text=’Choose one’)
# Functions for closing the window
def close_window():
window.destroy()
#*****************************************************************************
# Main Program
# label for permanent game text “Rock, Paper, Scissors
intro = “Rock, Paper, or Scissors?”
game_title = tk.Label(frame, text=intro, font=label_font, anchor=’center’)
game_title.grid(column=1, row=0, padx=5, pady=5, ipadx=5, ipady=5, sticky=sizing)
game_commentary = tk.Label(frame, text=”Choose One”, font=label_font, anchor=’center’)
game_commentary.grid(column=1, row=2, padx=5, pady=5, ipadx=5, ipady=5)
#palyer labels
player_scoreboard = tk.Label(frame, text=”Player Score:”, font=label_font, anchor=”center”)
player_scoreboard.grid(column=0, row=3, padx=5, pady=5, ipadx=5, ipady=5)
player_score = tk.Label(frame, text=0,font=label_font, anchor=”center”)
player_score.grid(column=0, row=4, padx=5, pady=5, ipadx=5, ipady=5)
#computer labels
computer_scoreboard = tk.Label(frame, text=”Computer Score:”, font=label_font, anchor=”center”)
#game_commentary.pack(pady=20)
computer_scoreboard.grid(column=2, row=3, padx=5, pady=5, ipadx=5, ipady=5)
computer_score = tk.Label(frame, text=0,font=label_font, anchor=”center”)
#game_commentary.pack(pady=20)
computer_score.grid(column=2, row=4, padx=5, pady=5, ipadx=5, ipady=5)
# Button for game options (ROCK/PAPER/SCISSORS)
rock_option = tk.Button(frame, text=”ROCK!”, font=button_font, command=rock_choice)
rock_option.grid(column=1, row=1, padx=5, pady=5, ipadx=5, ipady=5)
scissors_option = tk.Button(frame, text=”SCISSORS!”, font=button_font, command=scissors_choice)
scissors_option.grid(column=0, row=1, padx=5, pady=5, ipadx=5, ipady=5)
paper_option = tk.Button(frame, text=”PAPER!”, font=button_font, command=paper_choice)
paper_option.grid(column=2, row=1, padx=5, pady=5, ipadx=5, ipady=5)
reset_option = tk.Button(frame, text=”Reset Game”, font=button_font, command=reset_game)
reset_option.grid(column=1, row=4, padx=5, pady=5, ipadx=5, ipady=5)
# Button to Close Window
exit_button = tk.Button(canvas, text=”Exit Game”, font=button_font, command=lambda:close_window())
exit_button.grid(column=0, row=1, padx=5, pady=5, ipadx=5, ipady=5)
# run the program
window.mainloop()
#*****************************************************************************
# End Main Program Code