A To-Do list is a list that you can keep to put all of the tasks that you need to complete on a given day. It can be very useful for managing time, by planning your day ahead of time, and prioritizing activities.
Today, we will be creating a basic To-Do application using the Django framework. I’ll help you create an app where you can add new items to the list by clicking a button, and you can delete items from the list once the work gets completed.
If you know the fundamentals of Python, Django, and a little bit of HTML, you’re good to go with this project. So, let’s invest some time to make a beautiful web application using Django.
Step 1: Install Django
Let’s start the project. Before we proceed, make sure you have Django installed in your system. If you don’t have it, open your command line (or cmd) and install Django using the following command.
pip install django
If you’re on a Mac or Linux, use pip3 install django.
Make sure you have an Internet connection. Django will get downloaded automatically and installed in your system. Now, let’s move on and start our project.
Step 2: Start a New Project
Open your command prompt or command line. If you want to create your project in a specific folder, go to that folder using the cd command. For example, cd Desktop will take you to the Desktop folder.
Start the project by typing in the following command.
django-admin startproject todoproject
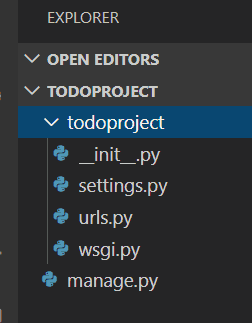
Then you will see that a new folder called todoproject is created which contains some files. Drag and drop that folder to your IDE (or you can open that folder in your IDE).
Inside the folder, we have the following files. In my case, I opened my project folder with the VSCode IDE.
Now, go inside the todoproject folder by typing the following in your command line/prompt.
cd todoproject
Now, let’s run the project using the following command.
python manage.py runserver
Use python3 manage.py runserver if you’re on a Mac/Linux.
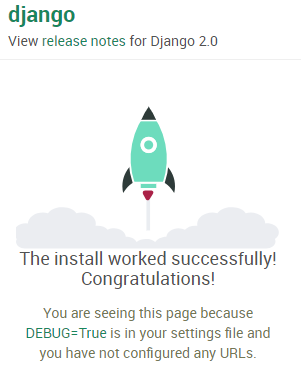
A URL address will be generated on the command line, something like ‘ http://127.0.0.1:8000/’.
Copy that URL and paste it on a new tab in your browser. Now you will see your Django project running on your web browser.
Step 3: Create an App
Now, let’s create an app. We call each individual functionality of a Django project as an app.
Open your command line and go to your project folder using the ‘cd’ command.
Now, you are in the directory called ‘todoproject‘. Let’s make an app and name it as ‘todoapp’.
python manage.py startapp todoapp
Now open your IDE. Go to ‘settings.py’ file and mention your app name in the INSTALLED_APPS list.
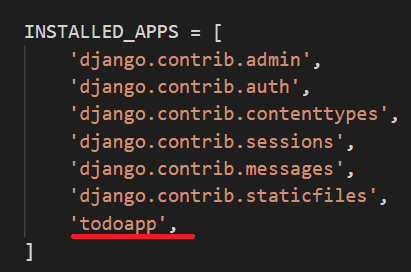
That’s it. Our app is ready. Now, let’s create a template for our todo list.
Step 4: Create a Template
Let’s create a template for our todo list app. For that, type in the following command:
mkdir templates
This command will create a new folder called ‘templates’ inside the project directory.
Open that in your IDE and manually create a new HTML file called ‘todolist.html’.
Now, let’s add a heading for our todo list app using an h1 tag.
<h1>My To Do List</h1>
Now, go to views.py file and add a view for the template.
from django.shortcuts import render
def todoappView(request):
    return render(request, 'todolist.html')
We need to link this view to the URL. So, go to urls.py and make the following changes at the bottom.
from django.contrib import admin
from django.urls import path
from todoapp.views import todoappView

urlpatterns = [
    path('admin/', admin.site.urls),
    path('todoapp/', todoappView),
]
Now, let’s go to settings.py file and make changes to the TEMPLATES list. Find the section called DIRS and replace that line with the following code. Django will look at this directory for templates.
'DIRS': [os.path.join(BASE_DIR, 'templates')],
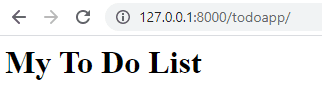
Now, run the server and go to the URL/todoapp.
You’ll see a page with the heading “My To Do App”.
Now, let’s go to the next steps.
Step 5: Create a Model
Let’s create a model representing each todo item that we’ll create and store in a database.
So, go to models.py and add the following code.
from django.db import models
class TodoListItem(models.Model):
    content = models.TextField()
This model represents each item on the todo list. We’ll use this model to interact with the database.
Now, we need to do migrations. We do migrations in Django when we need to change the configuration of the database.
Open your command prompt and type in the following:
python manage.py makemigrations
After that command is executed, type in the following command as well.
python manage.py migrate
Then, you’ll see the changes that we’ve done on your command prompt.
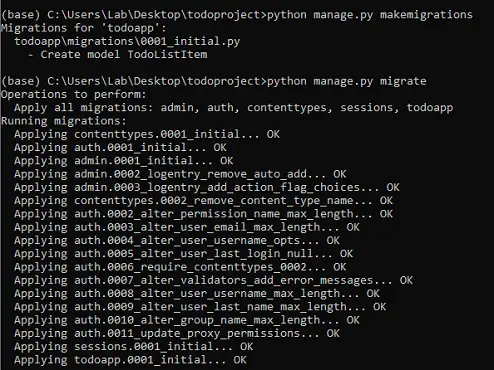
Now, the migration is completed, and we’re ready to use this model.
Step 6: Create the To-Do List
Now, let’s try to retrieve todo items to the view. Open views.py file, and import the model.
from .models import TodoListItem
We’ll create a new variable to store all the todo items. Then, we’ll return this list to the template file. So make the following changes in the view:
def todoappView(request):
    all_todo_items = TodoListItem.objects.all()
    return render(request, 'todolist.html',
    {'all_items':all_todo_items})
Here we’re returning the list ‘all_todo_items’ as ‘all_items’ via a dictionary.
Now, let’s go to the templates file and create a list to show all the todo items.
Open todolist.html and add the following code.
<ul>
    {% for i in all_items %}
    <li>{{i.content}}
    </li>
    {% endfor %}
</ul>
Here we’re using a for loop to iterate through the list of items we have in the all_items variable.
Now, just below the heading, let’s create a forum so that users can add the todo items to the list.
<form action="/addTodoItem/" method = "post">{% csrf_token %}
    <input type="text" name="content">
    <input type="submit" value="Add Todo Item">
</form>
We have two input tags in the forum. A text field for the user to type in the item, and a button to submit the item.
The action=”/addTodoItem/” will send an HTTP request to that URL. We’ll be using the POST request here. The tag {% csrf_token %} is added for security purposes.
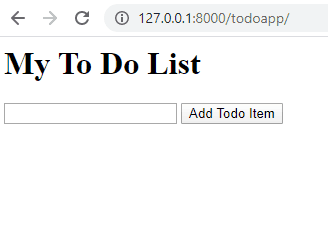
Now, when we refresh the URL, we’ll see a page like this:
Now, let’s go to views.py to create a view to handle that post request.
Add the following code to create a view to handle the request:
def addTodoView(request):
    x = request.POST['content']
    new_item = TodoListItem(content = x)
    new_item.save()
    return HttpResponseRedirect('/todoapp/')
We used a method called HttpResponseRedirect. So, we need to import that at the top of this file before we actually use it.
from django.http import HttpResponseRedirect
Now, go to urls.py and create a new path for the view that we’ve just now created.
path('addTodoItem/',addTodoView),
Also, don’t forget to import the addTodoView to the urls.py file. So, make the following change:
from todoapp.views import todoappView, addTodoView
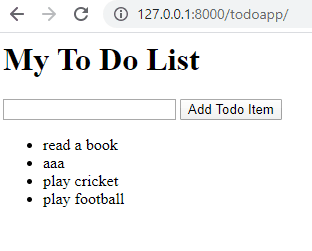
Now, refresh the page on your browser. You’ll be able to add new items to the list.
Step 7: Add Delete Buttons
Now, let’s go to the todolist.html file and create delete buttons for each todo list item.
So, add the following button in between the <li> tags just after the content.
<form action="/deleteTodoItem/{{i.id}}/" method = "post">{% csrf_token %}
            <input type="submit" value="Delete">
</form>
We use the id for identifying each specific item from the list.
Now, let’s go to urls.py and add a new path for the delete requests.
path('deleteTodoItem/<int:i>/', deleteTodoView),
We used the integer i as a primary key to identify the specific item in the list that needs to be deleted.
Also, don’t forget to import the deleteTodoView in this file.
from todoapp.views import todoappView, addTodoView, deleteTodoView
Now, let’s go to views.py and create a new view function for the delete requests.
def deleteTodoView(request, i):
    y = TodoListItem.objects.get(id= i)
    y.delete()
    return HttpResponseRedirect('/todoapp/')
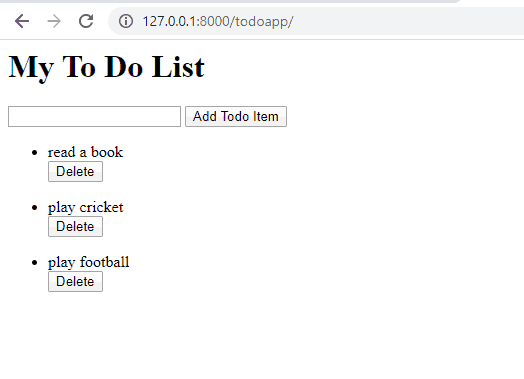
Now, our basic todo list app is ready.
How To Debug Errors?
It’s quite normal to see errors while doing a Django project. I encountered many errors while making this tutorial, but I was able to debug them without a lot of trouble.
If you face any errors, try to google the error or look for StackOverflow answers. If you can’t find them, just look through your terminal and the code. It might be a very simple error. I’ll point you to my GitHub repository, where I placed all the code I wrote while doing this project. You can have a look at it for reference if needed.
This is just a basic Django project to help you understand how Django works. I didn’t add any styling to the website. If you want to add some CSS styles, you can do it on your own.
If you have any doubts, feel free to ask them in the comments down below. I’ll be happy to help.
If you want to know how Django works, I would highly recommend you check out this article. I’ve written this article to help you understand how Django handles web requests.
If you want to do some more projects using Django, check out 12 Django Project Ideas for Beginners for finding some cool projects.
I would appreciate it if you would be willing to share this article. It will encourage me to create more useful tutorials like this.
Happy Coding!
19 thoughts on “How to Create a To-do List App Using Django”
Leave a Reply to Ashwin Joy Cancel reply
Recent Posts
Modular programming is a software design technique that emphasizes separating the functionality of a program into independent, interchangeable modules. In this tutorial, let's understand what modular...
While Flask provides the essentials to get a web application up and running, it doesn't force anything upon the developer. This means that many features aren't included in the core framework....
")
The first step is not precisely the first, you must improve this tutorial, if a python newbie visit this site surely can’t follow the next steps.
This tutorial is not for Python newbies. I’ve precisely mentioned that in the introduction. “If you know the fundamentals of Python, Django, and a little bit of HTML, you’re good to go with this project.”
If you know Python, Django, and HTML, you’ll be able to follow this. If you’re a newbie, learn these things first and then come back to this tutorial.
If I need to make any improvements, could you please explain what I need to do in a little more detail?
Thanks for this tutorial, works without any error and is didactic at least for me what I’m starting with this framework
I noticed some discrepancies between html file names. According to your Git, the correct file is todolist.html. If this is correct, would it be possible to update for future beginners? The first time this occurs it causes a template not to exist. Just trying to help others out if they had template issues.
Thanks, Brad for pointing out the mistake. I really appreciate it.
I’ve renamed the file from todo_list.html to todolist.html in the article. Hopefully, everything will work fine now.
will you explain whats going on here. (a bit with details)
def addTodoView(request):
x = request.POST[‘content’]
new_item = TodoListItem(content = x)
Here, I defined a new view to add the todo list item. The variable ‘x’ receives the content that we type in within the form. Then, I’ve added it to the list and saved it.
Thank you so much. This was very useful project for me as I am still a beginner in django framework programming. I got a sense of pride after completing this project.
Awesome! Keep coding and become a great programmer.
good afternoon, I am using pycharm and Django 3.1.6, I am trying to link the url as you said in step 4 but
when I write ‘ from todoapp.views import todoappView’ I having an error like the system does not recognize ‘todoapp’ and ‘todoappView’.
when I wrote ‘ ‘DIRS’: [os.path.join(BASE_DIR, ‘templates’)], ‘ I got an error ‘NameError: name ‘os’ is not defined’ so I imported os in setting, then a ran my program but I got another error ‘TemplateDoesNotExist’, I think is because the templates that was created using ‘mkdir templates’ wen to the project but not inside of the app so this is error after error like my life lol, does your have any advice?
Yeah man, this is how the life of a coder looks like. Sometimes, we get stuck, but just don’t give up. Whenever I face an error, I just copy-paste the error message into Google. Most probable, someone would have already gone through this error and shared their solutions on StackOverflow or some other websites. That’s how I usually debug the errors.
for the “os not defined” it could be you have not imported the os module into the file
When I completed my first step of running the URL server in browser I got image of rocket.
Then I could not able to run sever which I did all the process of todoapp like created templates,url.py,todolist.html,
Could tell the reason
Hi Sathish, I can’t tell you why your code is not working because it can be due to any errors. Please try to debug. You can search the error that you are getting on google and use the help of StackOverflow.
yo ashwin this helped me a lot i made a todo list for my sem 2 project and i had no idea that how to add the delete button this helped me a lot man and thanks , keep posting !!!
Awesome man! Glad that I could help you.
Can you please brief me about how to add a checkbox with each task so to check it whether completed or not?
You can add checkboxes using the input tag in HTML with type=”checkbox”.
Hummm…we set up a model and ran migrations. But when i log in to django admin, I don’t see anything in the actual postgred db.