Let’s have some fun today because we’re going to automate the process of logging into your Facebook account. Yes, you can automate a whole lot of things with a few lines of Python code. And it isn’t rocket science. It’s a lot simpler than you think.
Fasten your seat belts and be ready. Let’s write your first-ever automation script with Python.
To make everything easy, some brilliant developers have already created many modules (a module is a pretty long program to do a particular task that you can bind and reference) in the Python standard library. Hence, we don’t need to reinvent the wheel. We can use those modules and do things effortlessly.
To do web automation, we have a module in Python, which is called Selenium. It is a module that helps to automate scripts, and it lets you do a lot of things with your web browser.
We’ll do the full process in a few simple steps. Without any further adieu, let’s start the automation process.
Step 1: Install Selenium
I’m assuming that you already have python installed in your system. Now, let’s go ahead and install selenium using pip.
So, open up your command prompt (if you’re on Windows) or your command line or terminal or whatever, and let’s do the installation.
So, type in the following command if you’re a Windows user.
pip install selenium If you’re on a Mac or Linux, use pip3 instead of pip.
pip3 install seleniumNow, the command prompt or terminal will automatically download and install selenium, unless you turn off your Internet connection.
Now that you’ve installed selenium, let’s go to the next step.
2. Install A Web Driver
A web driver is a mandatory thing that you need to do web automation. This is required since we need to open a web browser like Chrome or Mozilla Firefox.
We’re going to be using the chrome browser, and hence, we need to install the Chrome Driver. Installing a chrome driver might seem overwhelming. Don’t worry, it can be done pretty easily.
I’m using a Windows laptop, and for me, a great option is Chocolatey. Mac users can go for a software called Homebrew, and the Linux geeks can use Debian.
So, install the chrome driver that is specific to your operating system.
For Windows users, installing Chocolatey can be a pain at first, so I’ll try to walk you through it if you are having some trouble doing it on your own.
Installing Chocolatey (Only for Windows Users)
First of all, you need to open your Powershell as an administrator, not a normal user. Do you know how to do it? Don’t worry, it isn’t a big deal. Press Windows+X on your keyboard, and click on “Windows Powershell(Admin)“.

And, now you’re having the Admin privileges. So, go to this link and copy-paste the code that is given there to install Chocolatey via Powershell.
If you’re lazy, I’ll give the code below, just copy and paste it on your Powershell window. And, don’t forget to smash the Enter key.
Set-ExecutionPolicy Bypass -Scope Process -Force; iex ((New-Object System.Net.WebClient).DownloadString('https://chocolatey.org/install.ps1'))This command will install the Chocolatey software on your Windows machine.
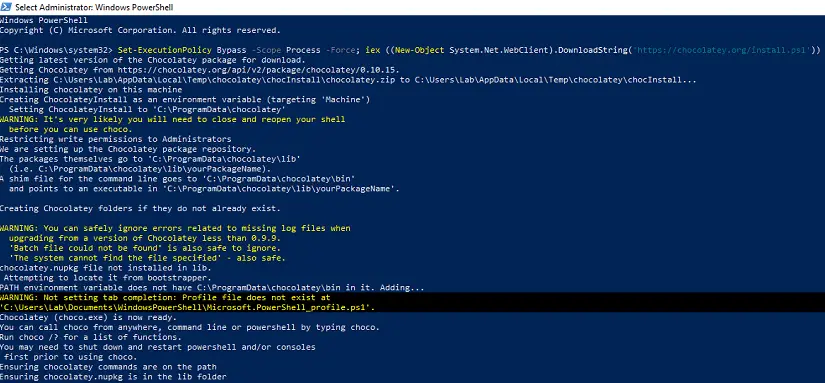
If you want to check whether it is installed perfectly, just type in ‘choco’ in your PowerShell or cmd. You’ll see something like this:

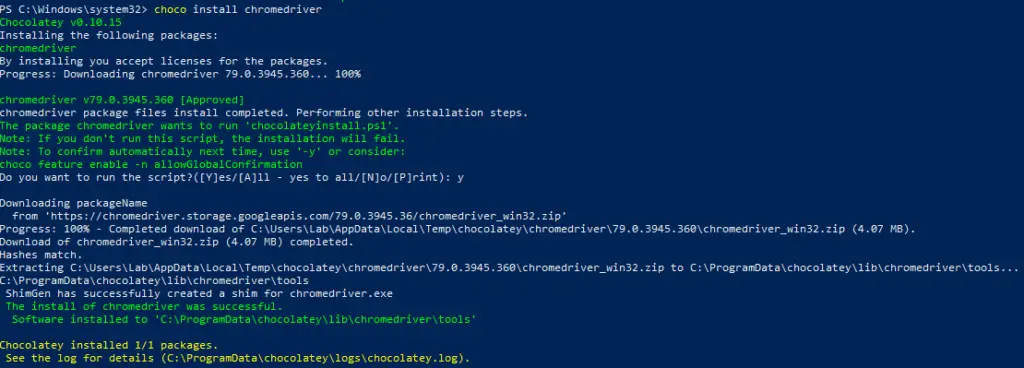
Now, let’s install the chrome driver using the choco command. Type in the following command in your PowerShell:
choco install chromedriver
You’ll see some gibberish, and the chromedriver will be installed in your system before you can read that gibberish code (I know you won’t even try to read it).
That’s it. Everything is perfectly set up to start automating the boring stuff. Now, it’s time to write some Python script.
If you prefer to install Chocolatey in some other ways, go ahead and read the Chocolatey installation guide for more information.
3. Write Python Script for Automation
Now, let’s start coding. Open up a new file and save it with the .py extension. I’m going to name my file “autofacebook.py” since we’re automating the Facebook website login process.
First of all, we’re going to write a small piece of code to automatically launch Facebook. We will be using the webdriver from the selenium module, and hence, we need to import it into our program.
from selenium import webdriverNow, let’s create a variable and do some cool stuff with it. I’m gonna name it as fb. And, we are launching facebook using the Chrome web browser. This is how we do it:
fb =  webdriver.Chrome()
fb.get('https://facebook.com')
If you want to use some other browsers, there are some methods in the webdriver module for that as well. We’re not going to talk about that since we’re focusing only on Chrome.
Now, let’s save this program and run it.
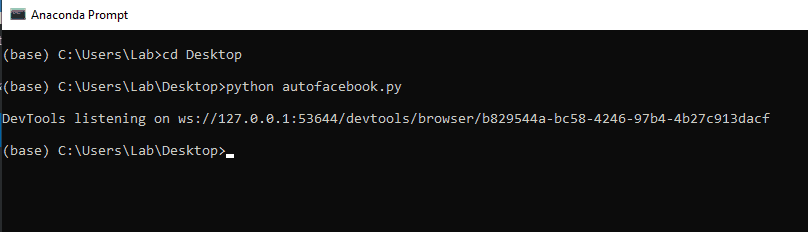
Go to your command prompt or Powershell (I’m using Anaconda Prompt) and run the python program however you like. I’m going to run mine using the following command.
python autofacebook.py
When you run this program, you can see a new Chrome browser window launching, and it will take you to the homepage of Facebook.
When you open Chrome, you can see the following message: Chrome is being controlled by automated test software.
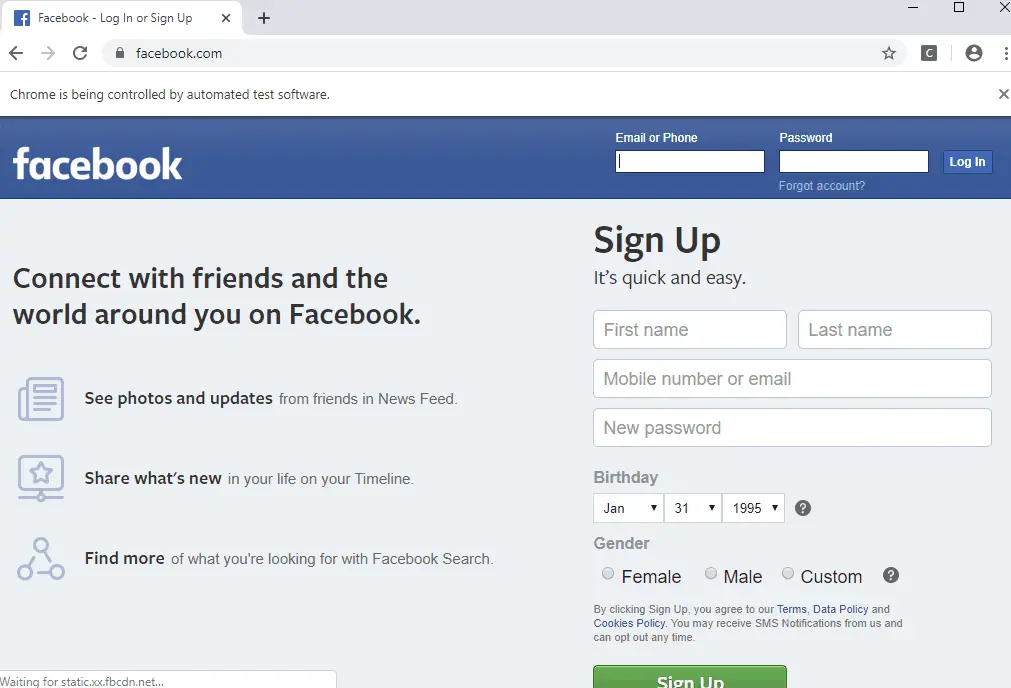
As you can see in the above image, we successfully automated the launching of the Facebook website.
Now, let’s try to automate the login process as well.
For that, you need to know how to use the inspect option in Chrome. If you don’t know it, I’ll try to teach you. I hope you’ll understand it easily.
First of all, I’ll give you the code, and then I’ll explain each line of it. So, you need to dd the following lines into your program.
username = fb.find_element_by_xpath('//*[@id="email"]')
username.send_keys('Your Username')
password = fb.find_element_by_xpath('//*[@id="pass"]')
password.send_keys('Your Password')
login = fb.find_element_by_xpath('//*[@id="u_0_b"]')
login.click()
Now, let’s break down each line of code, and I’ll try to explain it.
First of all, we define a variable for the user name field. We need to find the HTML element for this corresponding input field from the Facebook homepage. We will find the element, copy its Xpath, and use it in our code. Let me show you how to do it.
In case if you’re wondering what an Xpath is, I’ll tell you what it is. XPath (XML Path Language) is a query language for selecting nodes from an XML document. No need to worry about it too much at the moment.
So, open the Facebook home page, and let’s find the XPath for each field. Right-click on the input field for username, which is highlighted below.
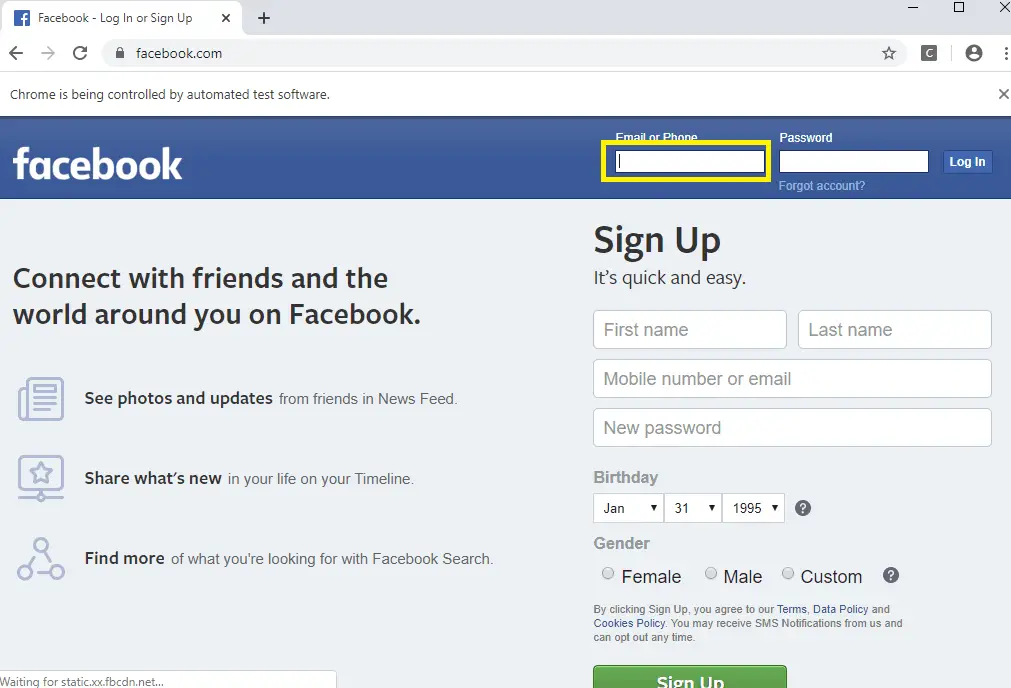
Now, click on Inspect.
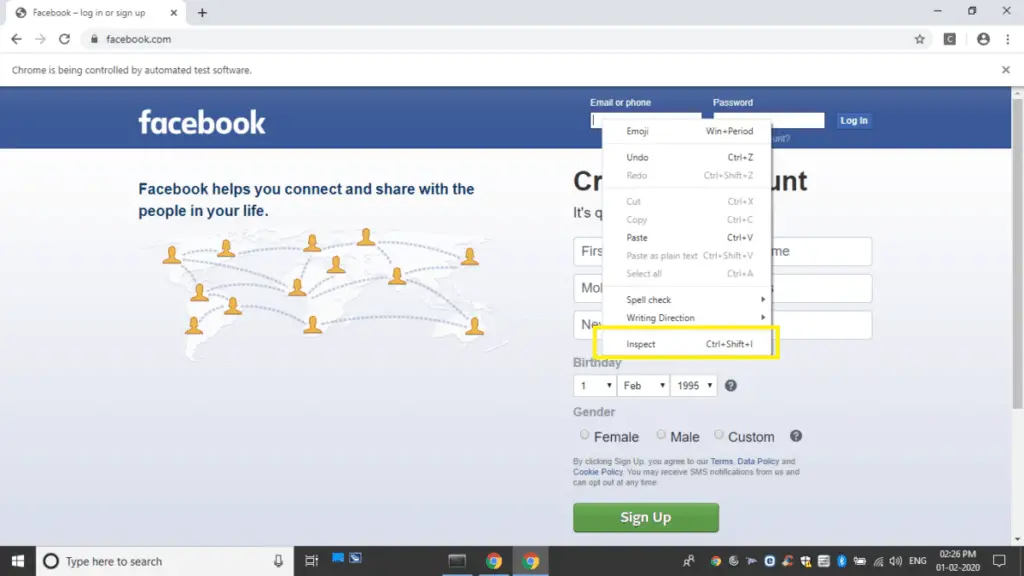
Now, you’ll be able to see the corresponding element (code) used for this input field. Right-click on that input field code.
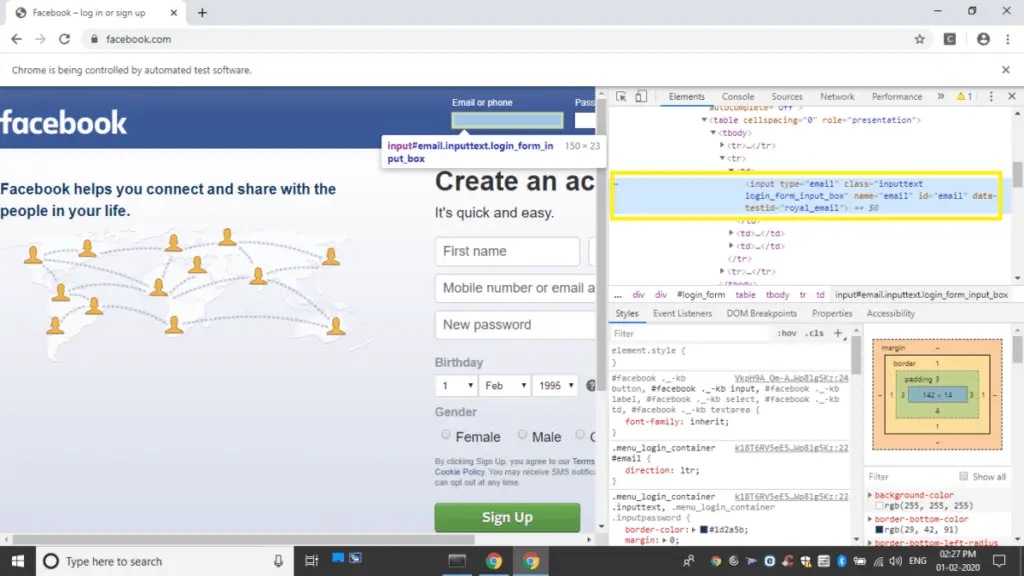
Now, click on Copy, and then Copy Xpath.
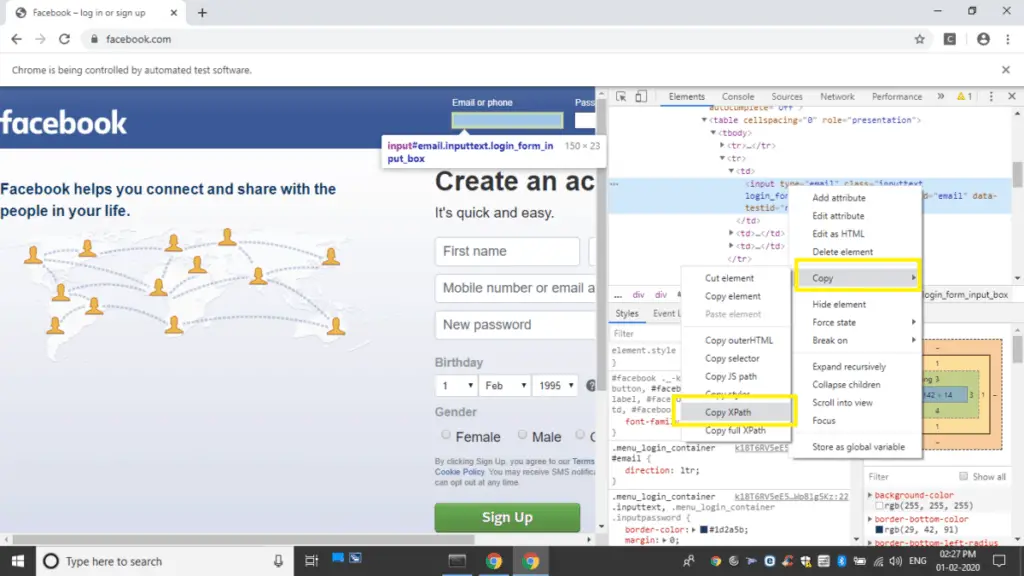
That is how we find the Xpath of each element. Now, paste it inside the method called find_element_by_xpath(”). We can use the fb variable to call this method. We assign this to the newly created variable called username. This is how we do it:
username = fb.find_element_by_xpath('//*[@id="email"]')Now, we need to pass the user name(email id) of your Facebook account. We can use the send_keys() method for doing that.
username.send_keys('Your Username')That’s it. Do the same procedure for the password as well. Create a variable, assign the Xpath, and provide the password of your Facebook account using the send_keys() method.
We can do almost the same procedure for the Login button as well. Find its Xpath and assign it to a variable. The only difference is that we don’t need to send any information to this field. We just need to click it. So, we’ll use the click() method.
That’s it. We’re done with coding the python script for automating the Facebook Login process. Here is the full Python script:
from selenium import webdriver

fb = webdriver.Chrome()
fb.get('https://facebook.com')
username = fb.find_element_by_xpath('//*[@id="email"]')
username.send_keys('Your Username')
password = fb.find_element_by_xpath('//*[@id="pass"]')
password.send_keys('Your Password')
login = fb.find_element_by_xpath('//*[@id="u_0_b"]')
login.click()
Now, go ahead and run your program in your command prompt, terminal, or Anaconda prompt. I’m using the following command to run the program.
python autofacebook.py

After running it, you’ll be amazed to see the automation happening. Your Python script will automatically type in your username and password to log in to your Facebook account.
I was thrilled to do it for the first time. I hope you also have some fun doing the automation process.
Final Thoughts
I hope you got a clear idea about the whole procedure. You can select whatever you want from websites and do anything with it. Just take these steps to the next level. You’ll have a lot of fun doing it.
This article was just a basic introduction to web automation. If you want to learn more about Selenium and automation, you can go through the official documentation of Selenium Browser Automation.
If you have any doubts or queries, feel free to put them down in the comments section. I’ll be happy to help you.
Related articles:
- Web Scraping Using Python BeautifulSoup
- Web Scraping With Python Selenium (Download Images from Google)
Happy Coding!
6 thoughts on “Web Automation With Python: A Beginner’s Guide”
Leave a Reply to Dino Cancel reply
Recent Posts
Modular programming is a software design technique that emphasizes separating the functionality of a program into independent, interchangeable modules. In this tutorial, let's understand what modular...
While Flask provides the essentials to get a web application up and running, it doesn't force anything upon the developer. This means that many features aren't included in the core framework....

Aswin,
Very nicely written! For my first time, I understood everything you wrote. There was not a lot of boring text with your explanation. The way your broke down each module, made me not want to walk away.
I thank you kindly and look forward to other articles you have in Python.
Esrle
Thanks. Glad that it helped you.
Ashwin,
This was a great first time experience using Python and selenium to automate a webpage. Everything was explained at an adequate depth without getting overly technical. The only issue I found was with the ‘Log In’ button. I found that Facebook webpage changed the XPath id every time I ran the script.
My solution was to use the ‘find_element_by_name’ function. The name was one aspect of the button that did not change every time I ran the script.
I agree with Earle when he said ‘I thank you kindly and look forward to other articles you have in Python’. Keep up the good work.
Hi Dino, Thanks for your valuable feedback.
Excellent guide!
I am impressed with this website , rattling I am a big fan .