Python is an amazing technology and there are so many things you can do with it. If you want to master Python language, you need to know some advanced concepts in Python along with the fundamentals.
In this article, let’s explore some advanced Python concepts such as generators, descriptors, privacy, decorators, comprehensions, regular expressions, file handling, lambda expressions, exception handling, etc.
Before we start with these topics, make sure you are strong in the fundamentals of Python. You can check out this link if you want to brush up on your Python basics. Once you have gained confidence in Python basics, you can start exploring the advanced concepts.
If you’re good to go, let’s dive right in.

Generators in Python
In Python, we can create special functions to efficiently generate a sequence of values without storing them in memory. These functions are called generators. Generators provide a way to generate values on the fly as they’re needed.
Let’s see an example of generators in Python.
def my_generator():
for i in range(5):
yield i
gen_object = my_generator()
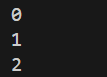
print(next(gen_object))
print(next(gen_object))
print(next(gen_object))Output:
In generators, we don’t store values directly. We are creating a way to generate those values as and when needed. This is achieved using the yield keyword.
We use the yield statement instead of the return statement in generator functions. The return statement will terminate a function, but the yield statement will not.
The yield statement yields a value to the caller and temporarily suspends the execution of the generator until the next value is requested. It remembers its state and when resumed, the function continues where it left off.
Let’s look at another example. The following Python code generates the Fibonacci sequence using a generator.
def fibonacci():
    a, b = 0, 1
    while True:
        yield a
        a, b = b, a + b

fib_generator = fibonacci()
for i in range(10):
    print(next(fib_generator), end=",")
Output:

Generators do lazy evaluations, which means they compute only the values that are needed. This is best for computationally expensive or time-consuming tasks.
Let’s see an example in which generators offer a clear advantage over alternative approaches. Suppose we have a text file with the name “myfile.txt”.
hello ERROR
hello hello
hi
how
ERROR
New ERROR
ha
ha
ahahaha
hahaha
ERRORahaha
h
a


ERRORHello World
We need to find the occurrences of a string in this file one by one. Let’s write the Python code for this using generators.
def find_lines(filename,keyword):
    with open(filename,'r') as file:
        for line in file:
            if keyword in line:
                yield line

linesGen = find_lines('myfile.txt','ERROR')

print(next(linesGen).strip())
print(next(linesGen).strip())
print(next(linesGen).strip())
Output:
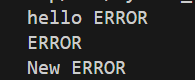
If we use traditional methods, we need to store the entire file content. By using a generator we can avoid storing the entire file in memory.
Descriptors in Python
Descriptors help to define how attribute access is handled for objects. In Python, attribute access is straightforward. Accessing an attribute simply retrieves its value. But what if you wanted more control over attribute access? Descriptors help you do that.
Let’s see a Python code without using a descriptor.
class MyClass:
    myAttribute = "Hello"
myObject = MyClass()
print(myObject.myAttribute)
Output:

In the above example, when I access the attribute of the class, it retrieves the attribute value.
With descriptors, you can customize the attribute access. It enables you to define custom behavior when getting, setting & deleting attributes by defining specific methods. These methods are:
| Method | Use Case |
|---|---|
| __get__(self, instance, owner) | Invoked when retrieving the value of an attribute |
| __set__(self, instance, owner) | Invoked when assigning the value of an attribute |
| __delete__(self, instance) | Invoked when deleting an attribute |
In these methods, the first argument, self, is the descriptor instance. The second argument instance is the instance of the object being accessed (or None if accessed through a class). Here, the owner is the class that owns the descriptor.
Let’s see an example of using a descriptor to change the behavior of attribute access.
class ReversedStringDescriptor:
def __get__(self, instance, owner):
print('get method invoked')
return self.value[::-1]
def __set__(self, instance, value):
print('set method invoked')
self.value = value
def __delete__(self, instance):
print('delete method invoked')
del self.value
class MyClass:
my_attribute = ReversedStringDescriptor()
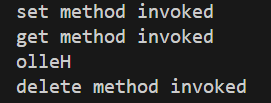
my_object = MyClass()
my_object.my_attribute = 'Hello'
print(my_object.my_attribute)
del my_object.my_attributeOutput:
Internal and Private Variables in Python
In Python, we can indicate that a variable should be treated as internal or private by prefixing its name with a single underscore or double underscore respectively.
When we add a single underscore ( _ ) before a variable name, we specify that the attribute is intended for internal use within the class. Please note that this does not enforce privacy or prevent access to the attribute from outside the class. It is still possible to access and modify the attribute from outside the class. The use of this convention is to encourage encapsulation and proper abstraction.
You can prefix the attribute name with a double underscore to indicate that it is a private variable. When this is done, Python performs name mangling, which modifies the name to include the class name as the prefix. However, note that this does not enforce true privacy like Java or other languages.
Here is an example code to illustrate internal and private variables in Python.
class Car:
    def __init__(self):
        self._internal_variable = "Internal"
        self.__private_variable = "Private"

c = Car()
print(c._internal_variable)

# Checking the attributes of the class to see the renamed private variable
print(dir(c))

print(c._Car__private_variable)
Output:

Decorators in Python
A decorator allows us to wrap another function to extend the behavior of the wrapped function, without permanently modifying it. In this way, you can add functionality to existing functions in a reusable and clean manner.
Let’s see an example:
def my_decorator(func):
    def wrap_func():
        print('**********')
        func()
        print('**********')
    return wrap_func

def say_hello():
    print('Hello')

say_hello = my_decorator(say_hello)
Output:
A decorator takes a function as input, adds some functionality to it, and returns a new function that typically replaces the original function.
You can use the @ symbol to apply a decorator function to a target function. With this, you don’t need to explicitly call the decorator function and pass the target function as an argument.
Here is an example.
def my_decorator(func):
def wrap_func():
print('**********')
func()
print('**********')
return wrap_func
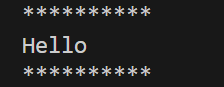
@my_decorator
def say_hello():
print('Hello')
say_hello()Output:
One example of using decorators is the @app.route decorator in the Flask framework. We use this decorator to define routes for different URLs in the web application. By using this, we can easily map different URLs to specific functions and define the behavior of the web app.
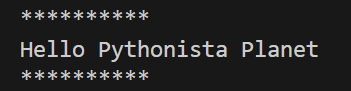
We can also decorate functions with arguments. Let’s see an example of that.
def my_decorator(func):
    def wrap_func(*args, **kwargs):
        print('**********')
        func(*args, **kwargs)
        print('**********')
    return wrap_func

@my_decorator
def greet(name):
    print(f"Hello {name}")

greet("Pythonista Planet")
Output:
Note: In Python, we can pass a variable number of arguments to a function using special symbols. In the above example, *args means you can add any number of non-keyword arguments, and **kwargs means you can add any number of keyword arguments.
Check out this link for examples on decorators in Python.
Comprehensions in Python
Comprehensions help us with a short and concise way to create new sequences (such as lists, sets, dictionaries, etc.).
List comprehension
Suppose we want to create a list of integers from 0 to 50 that are multiples of 5. This is how we normally write the code:
list = []
for i in range(50):
    if i % 5 == 0:
        list.append(i)

print(list)
Output:

By using list comprehensions, we can simplify this.
list = [i for i in range(50) if i % 5 == 0]
print(list)
Output:
Dictionary comprehension
Let’s say we want to create a dictionary like this:
dictionary = {
    0:"item0",
    1:"item1",
    2:"item2",
}
We can use dictionary comprehension to do this easily.
myDictionary = {i:f"item{i}" for i in range(3)}When we print these, both would give the same output.
dictionary = {
    0:"item0",
    1:"item1",
    2:"item2",
}

myDictionary = {i:f"item{i}" for i in range(3)}

print(dictionary)
print(myDictionary)
Output:

Now, let’s say you want to create a dictionary of numbers between 0 and 30 and multiples of 9. We want to swap the keys and values of this dictionary. Here’s how we do it.
dict = {i:f"item{i}" for i in range(30) if i%9==0}
reverseDict = {value:key for key, value in dict.items()}

print(dict)
print(reverseDict)
Output:

Set comprehension
Similarly, we can create set comprehensions as well. Suppose we have a list and we want to convert it into a list.
This is how we do it generally.
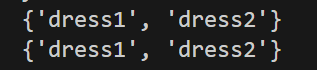
myDresses = ["dress1", "dress2", "dress1", "dress2", "dress1", "dress2"]
d = set(myDresses)
print(d)
You can do the same thing with a set comprehension.
dresses = {dress for dress in ["dress1", "dress2", "dress1", "dress2", "dress1", "dress2"]}
print(dresses)
If we print both sets, we will get the same output.
Output:
Generator comprehension
We can also use generator comprehension to simplify the process of creating a generator.
myGenerator = (i for i in range(5,10))
print(next(myGenerator))
Output:

Note: Tuple comprehension is not present in Python. Comprehension works by looping or iterating over items and assigning them into a container and a tuple is unable to receive assignments. Hence, we don’t have comprehensions for tuples in Python.
Regular Expressions in Python
In Python, a regular expression is a sequence of characters that forms a search pattern. It can be used to match a string or find substrings in a string.
We can use the re module in Python for implementing regular expressions. This module has some in-built functions you can use for pattern matching.
| Method | Use case |
|---|---|
| search | Returns a Match object if there is a pattern match in the string. |
| findall | Returns a list that has all the pattern matches. |
| split | Returns a list in which the string has been split at each match. |
| sub | Substitutes all the matches with a string. |
Let’s look at a few examples.
Example 1:
The following Python code checks if the string starts with “No” and ends with “gain”
import re
txt = "No pain, no gain"
x = re.search("^No.*gain$", txt)
if x:
  print("YES! We have a match!")
else:
  print("No match")
Output:

In this example, we are using some metacharacters. Metacharacters have some special meanings. You can check the meaning of metacharacters below.
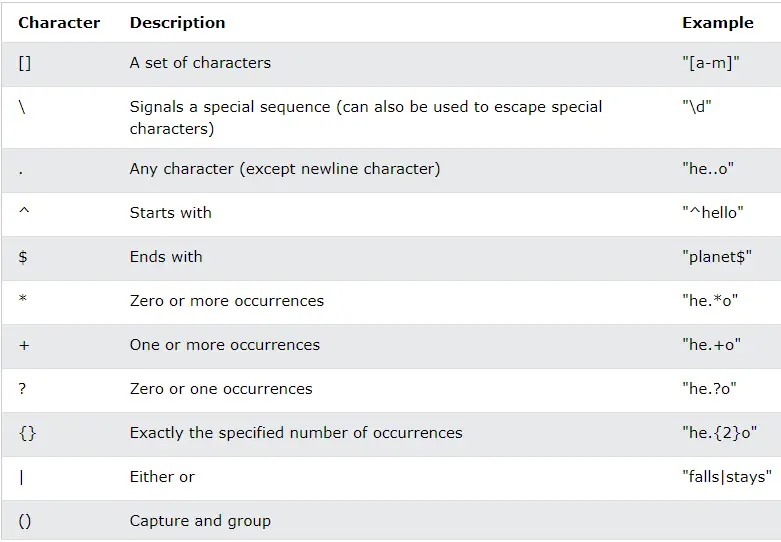
We also have some special sequences to make things easy. You can check out this link for understanding metacharacters and special sequences in Python Regex.
Example 2:
The following Python code finds all the occurrences of the pattern “ai” in the string.
import re
txt = "No pain, no gain"
x = re.findall("ai", txt)
print(x)
Output:

Example 3:
The below Python code splits the string at every white-space character.
x = re.split("\s", txt)
print(x)
Output:

In this example, “/s” is a special sequence we use. This returns a match where the string contains a white space character.
Example 4:
The following Python code substitutes all white spaces with the character #.
import re
txt = "No pain, no gain"
x = re.sub("\s", "#", txt)
print(x)
Output:

Click this link to see more examples on regular expressions in Python.
File Handling in Python
We can handle files using Python and perform operations like opening, reading, and writing on the files. Let’s see how we can open files, read the contents of the files, and write to the files using Python.
There are some modes available in Python to handle the files. They are:
- “r” – read mode (for reading the contents of the file)
- “w” – write mode (for writing content to the file)
- “a” – append mode (for adding new content to the end of the file)
- “b” – binary mode (for non-text files such as images and audio files)
Opening Files
To open files using Python, we can use the open() function and pass the file path and mode as arguments.
Syntax: variable = open(“file path”, “mode”)
Whenever we open a file, it must be closed after use. We can close files using the close() method.
Let’s see an example. I’ve created a text file called “myfile.txt”. Let’s see how we can open it.
x = open("myfile.txt","r")
x.close()
Reading Files
We can read the contents of a file using Python with the help of the read() method. Let’s see an example.
I’ve written a sentence “Hello World” in the “myfile.txt” file.
Now, let’s see how we can read this file using Python and print the contents on the console.
x = open("myfile.txt","r")
content = x.read()
print(content)
x.close()
When we run this code, we will be able to see the file contents as output.

In the read() method, you can specify a number if you want to read only a certain number of bytes.
x = open("myfile.txt","r")
content = x.read(5)
print(content)
x.close()
You can also use the readlines() method to return a list in which each element is a line in the file.
x = open("myfile.txt","r")
content = x.readlines()
print(content)
x.close()
Writing to Files
We can write to files by opening the files using “w” mode and using the write() method to write the contents. Let’s see an example.
x = open("myfile.txt","w")
x.write("A Python coder has hacked this file!")
x.close()
Now, if we open the file, we will see that the file content has been changed.

Note: The “w” mode will create a new file if the file doesn’t exist. When a file in the system is opened using “w” mode, the existing content in the file will be deleted.
Appending Content to a File
If we use the “a” mode (append mode) and write content, the existing content will not be replaced. The new content will be appended to the existing content.
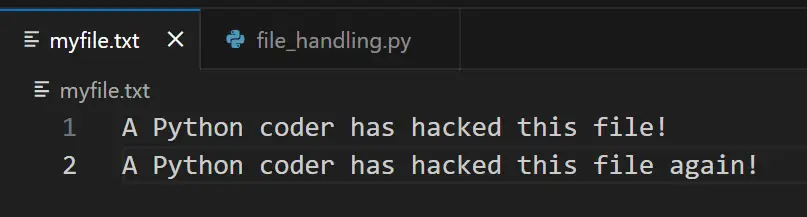
x = open("myfile.txt","a")
x.write("\nA Python coder has hacked this file again!")
x.close()
Now when you run the above code, you can see the text has been added at the end of the file without removing the existing content.
Lambda Functions in Python
A lambda function is a small anonymous function (a function without a name).
The syntax of a lambda function is as follows:
lambda arguments : expressionLet’s see an example. Suppose we have a function that returns the square of a number.
def square(num):
    return num * num

print(square(6))
Output:

The same function can be created as a lambda function as follows.
square = lambda num: num * num
print(square(6))
Output:
Let’s look at another example. The following Python code creates a lambda function that finds out the greatest number among two.
greater = lambda num1, num2: num1 if num1 > num2 else num2
print(greater(10,6))
Output:

Note: In Python, we use indentation to separate blocks of code, and it doesn’t have any special characters like curly braces to group a block of code. Hence, lambda functions in Python will be of a single line. We use lambda functions when we need only a small function for a short time. They’re often used as arguments to higher-order functions (passing a function as an argument to another function).
Check out this link for examples on lambda functions.
Exception Handling in Python
We can handle exceptions in Python using try-except statements. An exception is an event that occurs due to incorrect code or input. When an exception occurs, the program immediately stops. Exception handling is useful when dealing with user inputs.
The different types of exceptions are:
| ZeroDivisionError | It occurs when we divide something by 0. |
| ImportError | It occurs when an import fails. |
| IndexError | It occurs when a list is indexed with an out-of-range number. |
| NameError | It occurs when we use an unknown variable. |
| SyntaxError | It occurs when the code can’t be parsed properly. |
| TypeError | It occurs when we call a function on a value of an inappropriate type. |
| ValueError | It occurs when we call a function on a value of the correct type, but with an inappropriate value. |
try-except
To handle exceptions and to call some code when an exception occurs, you can use a try/except statement. The try block contains the code that we want to test.
If that exception occurs, the code in the try block stops its execution, and the code in the except block runs. The code in the except block will not run if there are no errors.
try:
    num1 = 7
    num2 = 0
    print(num1/num2)
    print("Done calculation")
except ZeroDivisionError:
    print("Error! Do not divide by zero")
The output will be: ‘Error! Do not divide by zero‘.

We can also use multiple except blocks at the same time to handle different exceptions.
Let’s see an example:
try:
    mango=10
    print(mango+" juice ")
    print(mango/2)
except ZeroDivisionError:
    print(" Division by zero. ")
except (ValueError,TypeError):
    print("Error")
The output will be: ‘Error‘

We can simply put an except statement without specifying any exceptions. It will catch all the errors. This should be used sparingly, as they can catch unexpected errors and may hide programming mistakes.
Let’s see an example :
try:
    mango = " juice "
    print(mango/0)
except:
    print("Error")
The output will be: ‘ Error ‘
finally
We can use the finally statement at the end of a try/except block to ensure that some code will run even if there are errors.
try:
    print("Hello")
    print(1/0)
except ZeroDivisionError:
    print("Division by zero ")
finally:
    print("This code will run always")
Output:

You can check out this link for more examples of exception handling in Python.
Final Thoughts
Kudos to you for completing this tutorial on advanced Python concepts. I hope you had fun. I’d suggest you practice these concepts by writing Python code yourself. Now you can start incorporating these advanced concepts into your code as and when needed.
Happy coding!
Recent Posts
Modular programming is a software design technique that emphasizes separating the functionality of a program into independent, interchangeable modules. In this tutorial, let's understand what modular...
While Flask provides the essentials to get a web application up and running, it doesn't force anything upon the developer. This means that many features aren't included in the core framework....
