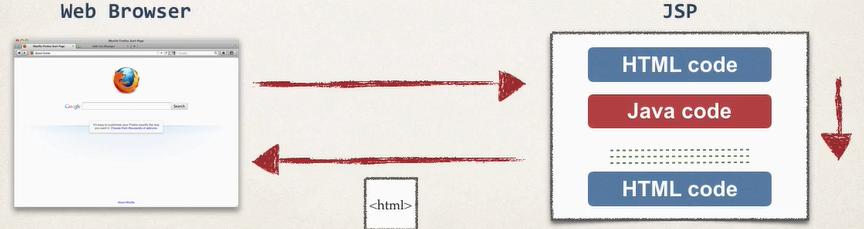
JSP is a technology that helps developers to create dynamically generated web pages using Java. In short, JSP is Java code that runs on the web server. It reads user input from web pages, performs the tasks, and returns an HTML page that is generated dynamically.
JSP is an important component of Java EE (Enterprise Edition). To build JSP apps, you need a JDK, a Java application server, and a Java IDE. We can use Eclipse as the IDE and Tomcat as the application server.
What is JSP?
A JSP file is an HTML file that has some Java code in it. The Java code helps to generate dynamic content on the HTML page. JSP is processed on the server, and the results of Java code generate HTML and is returned to the browser.
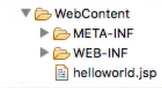
The .jsp file is placed inside the WebContent folder inside your Java Web project.
To run a JSP app, you need an application server. Let’s Download Tomcat and place it in your system. Then, go to:
Window -> Show View -> Servers -> Open.
Now you can create a new Tomcat server from here.
Click the given link and add a runtime environment by opening the folder where you have Tomcat software -> Select Apache -> Tomcat server version -> Next -> Finish.
Now you can see the Tomcat server in the Servers Window. You can right-click and start the server there.
Hello World in JSP
Open Eclipse -> File -> New -> Project ->Dynamic Web Project -> Give a project name -> Click on Next -> Remove the existing directory (src/main/java) -> Add a new folder (src) -> Click on Next -> Change the directory name (if it is src/main/webapp) to WebContent -> Click on Finish.
Right-click on WebContent folder and create a new file called helloworld.jsp.

Let’s write the Hello World code in JSP.
<html>
<body>
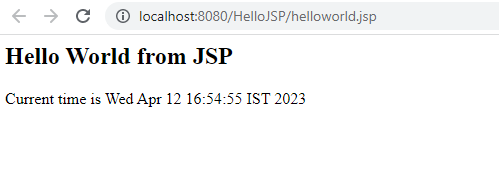
<h2>Hello World from JSP</h2>
Current time is <%= new java.util.Date() %>
</body>
</html>We have added an H2 heading. The Java code in a JSP file is written between <%= and %>. In the above code, I have added the Java code to print the current date and time.
Now let’s run the code.
Run -> Run on Server -> Select the Tomcat server -> Finish
The output will be displayed on the browser on the localhost server.
JSP Scripting Elements
Java code can be written in a JSP file in three ways. The following are the 3 types of scripting elements in JSP:
| Type of JSP Scripting Element | Syntax |
|---|---|
| JSP Expression | <%= Java expression %> |
| JSP Scriptlet | <% Java code (1 to many lines) %> |
| JSP Declaration | <%! variable or method declarations %> |
JSP Expression: You can compute some type of expression and the result is included in the HTML page that is returned to the browser.
The above “Hello World” program is an example of this. Here is another example:
<html>
	<body>
		<h2>Hello JSP</h2>
		<%= 100*5 %>
		<%= new String("Hello World").toUpperCase() %>
	</body>
</html>
You can add objects, mathematical expressions, boolean expressions, etc., in a JSP expression.
JSP Scriptlets: A scriptlet allows you to add 1 to many lines of Java code. You can include content on the page using out.println() method.
<html>
	<body>
		<h2>Hello JSP</h2>
		<%

		for(int i=0; i<10; i++){
			out.println("<br>The number is: "+i);
		}

		%>
	</body>
</html>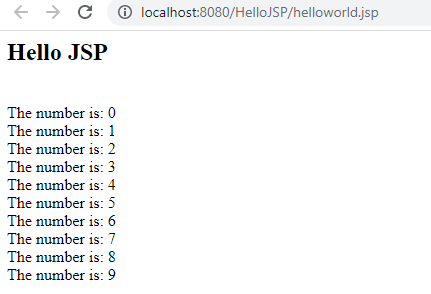
It is better to minimize the amount of scriptlet code in JSP. Avoid dumping so many lines of code in JSP.
JSP Declarations: In JSP, you can define a method and call the method from the same JSP page using JSP declarations.
<html>
	<body>
		<h2>Hello JSP</h2>
		<%!
		String printHello(){
			return "Hello World! This is a JSP Declaration.";
		}
		%>
		<h3> <%= printHello() %> </h3>
	</body>
</html>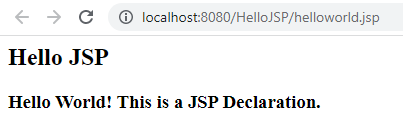
Connecting Java Classes with JSP
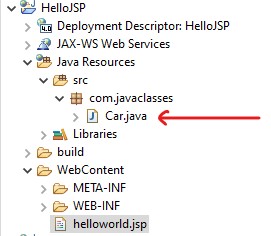
You can easily connect Java classes with JSP files. You can go to Java Resources -> src and create a new package. Inside the package, you can create your Java class.
package com.javaclasses;

public class Car {
	public static String name = "Tata Altroz";

	public static String getData(){
		return name;
	}
}
Now, let’s connect this class with helloworld.jsp file.
<html>
	<body>
		<h3> <%= com.javaclasses.Car.getData() %> </h3>
	</body>
</html>
A better way to write this code is by importing the class first.
<%@ page import="com.javaclasses.Car" %>

<html>
	<body>
		<h3> <%= Car.getData() %> </h3>
	</body>
</html>
You can also import other Java modules to JSP using this way.
<%@ page import="com.javaclasses.Car, java.util.ArrayList" %>JSP Built-in Server Objects
JSP provides many built-in server objects like out, request, response, session, application, etc. These server objects have many built-in methods you can use. For example, we have used the out.println() method in one of the previous examples.
Let’s see another example:
<html>
	<body>
		<h3> <%= request.getHeader("User-Agent") %> </h3>
	</body>
</html>
Including Files in JSP
We can include other files in JSP. For example, if you are building a website and you have multiple pages using the same header and footer. In that case, you can create the header and footer in separate files and include them on all the other pages.
Let’s create a header.html file inside WebContent folder.
<html>
	<body>
		<h1> Pythonista Planet </h1>
	</body>
</html>
Now, let’s include this in the helloworld.jsp file.
<html>
	<body>
		<jsp:include page="header.html" />
		<h3> <%= request.getHeader("User-Agent") %> </h3>
	</body>
</html>
Now you can see that the header is included in the JSP file.

Reading Form Data in JSP
Let’s see how we can read form data in JSP.
First, let’s create an HTML form that accepts the first name and last name of the user.
<html>
	<body>
		<form action="userdata.jsp">
			First Name: <input type="text" name="firstName"/>
			Last Name: <input type="text" name="lastName"/>
			<input type="submit" value="Submit" />
		</form>
	</body>
</html>
Notice that the form sends data to a file called userdata.jsp. Let’s create this file inside WebContent folder and write the code to display the data sent by the form.
<html>
	<body>

		The first name is <%= request.getParameter("firstName") %> <br>
		The last name is <%= request.getParameter("lastName") %>

	</body>
</html>
Now, let’s run the app.

When we submit the form, it takes us to the following page.

You can also do the same code in an alternate way in the userdata.jsp file.
<html>
	<body>
		The first name is ${param.firstName} <br>
		The last name is ${param.lastName}

	</body>
</html>
Adding more form elements
Now let’s add a few more form elements like dropdowns, radio buttons, checkboxes, etc., to the website and see how JSP can process the data.
Here is the updated helloworld.jsp file:
<html>
<body>
<form action="userdata.jsp">
First Name: <input type="text" name="firstName"/> <br><br>
Last Name: <input type="text" name="lastName"/> <br><br>
Country: <select name="country"> <br><br>
<option> Argentina </option>
<option> Brazil </option>
<option> Canada </option>
<option> India </option>
<option> United Kingdom </option>
<option> United States </option>
</select> <br><br>
Language:
<input type="radio" name="language" value="English" checked>English
<input type="radio" name="language" value="Hindi">Hindi
<input type="radio" name="language" value="Portugese">Portugese
<input type="radio" name="language" value="Spanish">Spanish<br><br>
Programming Languages:
<input type="checkbox" value="C" name="programming">C
<input type="checkbox" value="Python" name="programming">Python
<input type="checkbox" value="Java" name="programming">Java
<input type="checkbox" value="Javascript" name="programming">Javascript
<br> <br>
<input type="submit" value="Submit" />
</form>
</body>
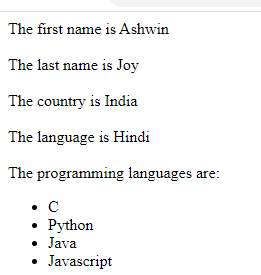
</html>The updated userdata.jsp file is as follows:
<html>
  <body>
	The first name is ${param.firstName} <br><br>
	The last name is ${param.lastName} <br><br>
	The country is ${param.country} <br><br>
	The language is ${param.language} <br><br>

	<%  String[] myArray = request.getParameterValues("programming");
		if(myArray!=null){
			out.println("The programming languages are:");
			%>  <ul>  <%
			for(String s : myArray){
				out.println("<li>"+s+"</li>");
			}
		}
	%>
	</ul>
  </body>
</html>
Output:

When the form is submitted, the browser displays the following page that shows all the data submitted by the user.
Sessions in JSP
A JSP session object is created once for a browser’s session and is unique for a given user. We use sessions to keep track of the user’s actions on the web application. You can think of a session like a shopping cart for a unique user on a web app.
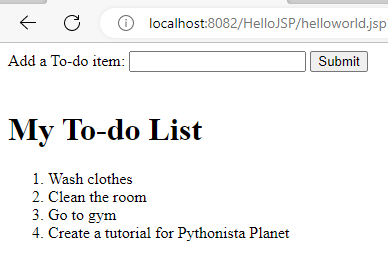
Let’s create a To-do list application to demonstrate the concept of sessions. This app lets the user add items to the to-do list. The to-do list items will be stored in the user’s session object. Each user will have their own to-do list.
To add data to the session, you can use the following syntax:
session.setAttribute(String name, Object value);The name is just a label and the value is any object that you want to place in the session.
Here’s the complete code to handle user sessions with a to-do list app.
<%@ page import="java.util.*" %>
<html>
  <body>
	<form action="helloworld.jsp">
	  Add a To-do item: <input type="text" name="toDoItem">
	  <input type="submit" value="Submit"> <br> <br>
	  <%
	  String item = request.getParameter("toDoItem");
	  List<String> items = (List<String>) session.getAttribute("myToDo");
	  if(items==null){
		 items = new ArrayList<String>();
		 session.setAttribute("myToDo", items);
	  }else{
		if ((item != null) && (! item.trim().equals("")) && !items.contains(item.trim())){
		  items.add(item);
		}
	  }
	  %>

	  <h1> My To-do List</h1>
	  <ol>
	  <%
		for(String s: items){
		  out.println("<li>"+ s +"</li>");
		}
	  %>
	  </ol>
	</form>
  </body>
</html>
Output on the browser.
You can open another browser and create another session to test the app. Each browser accessing the web app will have a unique session. This way, we can keep track of each user’s individual actions.
The Tomcat server and browser will handle the unique session id generation and pass the session id back and forth. You as a developer don’t have to worry about all these things.
Cookies in JSP
Cookies allow us to personalize a web application for users. It allows you to keep track of the long-term preferences of users even after they close the browser and restart it. A cookie is some text data that is exchanged between the browser and the server.
A cookie is a name-value pair. A cookie will have a given name and a corresponding value. For example:
name: myApp.favoriteSport
value: Cricket
A web can have many cookies. Cookies are stored in browsers and they can be used to give suggestions or personalized content to the user.
There is a class called Cookie defined in the java.servlet.http package. This package is automatically available in JSP by default. You don’t need to import it specifically.
You can create a cookie by passing the name and value to the Cookie() constructor.
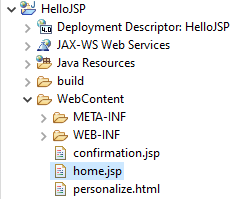
Cookie(String name, String value)Now, let’s build a small web application that gives personalized content to the user by using cookies. This web app will have a home page (home.jsp) that suggests news about the user’s favorite sport.
The user can change his preferences by going to another page on the site (personalize.html). Once the user updates his preferences, a confirmation page appears (confirmation.jsp). The user can go back to the home page and see the updated home page and content.
The project structure is as follows:
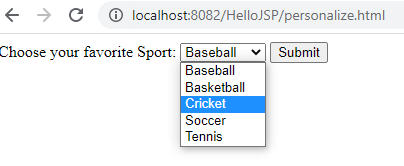
Let’s write the HTML code for the personalize.html page.
<html>
<head>
  <title>Personalize your favorite Sports</title>
</head>
<body>
  <form action="confirmation.jsp">
    Choose your favorite Sport:
	<select name="sports">
	  <option value="Baseball"> Baseball </option>
	  <option value="Basketball"> Basketball </option>
	  <option value="Cricket"> Cricket </option>
	  <option value="Soccer"> Soccer </option>
	  <option value="Tennis"> Tennis </option>
	</select>
	<input type="submit" value="Submit">
  </form>
</body>
</html>
Output:
Now let’s create the confirmation.jsp page with the following code.
<html>
<head>
  <title>Confirmation about your favorite Sports</title>
</head>
  <%
    String favSport = request.getParameter("sports");
	Cookie myCookie = new Cookie("myApp.favSport", favSport);
	// Setting life-span of the cookie in seconds.
	myCookie.setMaxAge(60*60*24*265);
	// Send the cookie to the browser.
	response.addCookie(myCookie);
  %>
<body>
  Thank you. We set your favorite Sport to ${param.sports}.
  <br> <br>
  <a href="home.jsp">Return to home page.</a>
</body>
</html>
Output:

The following is the code for home.jsp page, which is a personalized home page of the user.
<html>
<head>
  <title>Sports Portal</title>
</head>
<body>
  <%
    // Setting the default choice.
    String favSport = "Soccer";

  	Cookie[] myCookies = request.getCookies();
  	if(myCookies != null){
  	  for(Cookie c : myCookies){
  		if("myApp.favSport".equals(c.getName())){
  		  favSport = c.getValue();
  		  break;
  		}
  	  }
  	}
  %>

  <!-- Showing a personalized page based on the cookie info.  -->
  <h1>Latest News About <%= favSport %></h1>
  <h3>News Item 1</h3>
  <h3>News Item 2</h3>
  <h3>News Item 3</h3>
  <a href="personalize.html">[Personalize this page]</a>

</body>
</html>
Output:
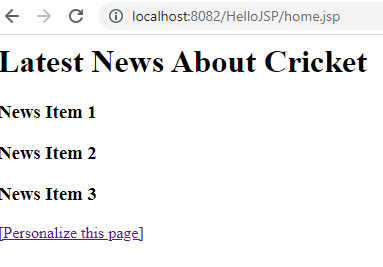
Now if the user goes and makes changes to the favorite Sport preference, the home will change based on the user preference.
Recent Posts
Modular programming is a software design technique that emphasizes separating the functionality of a program into independent, interchangeable modules. In this tutorial, let's understand what modular...
While Flask provides the essentials to get a web application up and running, it doesn't force anything upon the developer. This means that many features aren't included in the core framework....
