Let’s begin our Django database interaction tutorial. In this tutorial, we will be learning how to connect to the database, how to create models, how to insert and retrieve data from the database, and finally the Django admin interface!
Django is completely flexible and open to a variety of databases including SQLite, MariaDB, Postgres, etc. We are dealing with Sqlite3 in this project.
So, let’s start our new project right away.
Step.1
Create a new folder on your desktop or anywhere you like and name it ‘Project3’. Then, go to your command line (command prompt) and navigate to the folder using the cd command.
Once you reached your folder, start a new project named ‘dbproject’.
django-admin startproject dbprojectGo inside your project folder by typing ‘cd dbproject’ and create a new app. I’m naming my app as ‘dbapp’.
python manage.py startapp dbappIf you are a MAC/Linux user, type in python3 instead of python.
Step.2
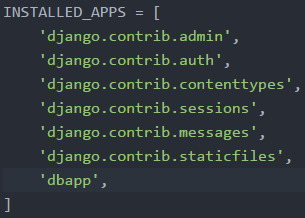
Open the project folder ‘dbproject’ using your IDE or editor. Go to ‘settings.py’ and add the newly created app to the INSTALLED_APPS list.
Step.3
All the database-related things are actually written in ‘models.py’. So, we are going to create our models.
Open ‘models.py’ and include the following lines of code. We are creating a model to display a text field in the Django admin interface.
from django.db import modelsclass

Dbapp(models.Model):
    text = models.TextField()
Step.4
Whenever we create models, we have to register them in ‘admin.py’. So, open ‘admin.py’ and type in the following.
from django.contrib import admin
from models import Dbapp

admin.site.register(Dbapp)
Step.5
Now, we are going to set up the Django admin. So, go to your command line and navigate to the ‘dbproject’ folder.
The next thing we want to do is to make migrations in our project. so, first of all, type in :
python manage.py migrateIf you are a MAC/Linux user, type in python3 instead of python. Next, make migrations for our ‘dbapp’.
python manage.py makemigrations dbappAfter that, type in the following command too.
python manage.py migrate dbappNow, we are ready to launch the Django admin. But before logging in, we have to generate a username and password.
For that, type in the following command:
python manage.py createsuperuserThen, you can create your username and password there. If you have created those two, we are all set to log into the Django admin interface.
So let’s run the server.
python manage.py runserver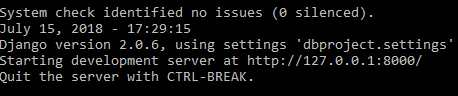
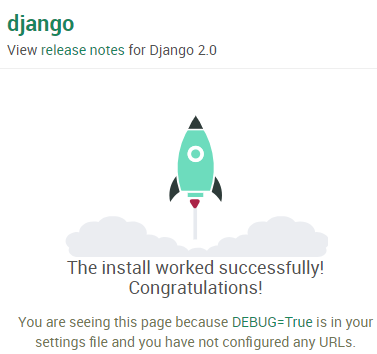
Copy that URL you got and paste it on a new tab. Your Django app will be up and running.
Step.6
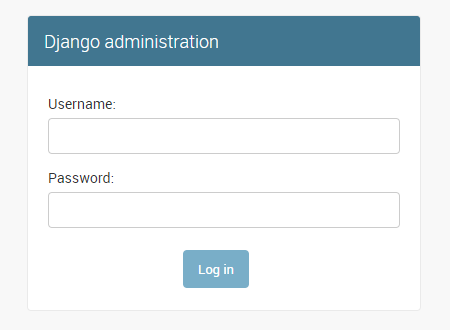
Now after the URL you just pasted, add ‘/admin’ and hit Enter on your keyboard.

Now, a login screen will appear. Type in your username and password to log into the admin area.
After you successfully log in, you will be able to see the Django admin interface which is free to use.
You don’t need to write a single line of code to create an admin area. It is built-in with Django. You can use it according to the models you have created.
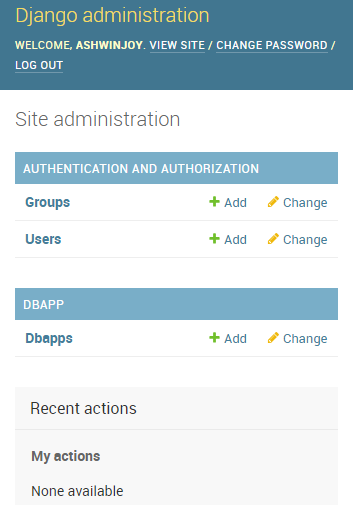
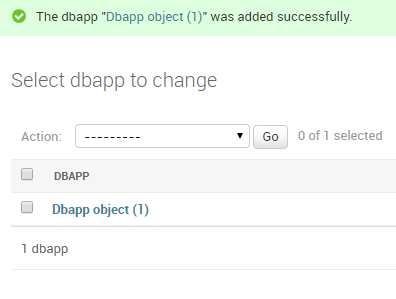
We can create our texts by clicking on the add button of Dbapps. You can type in the text and click save.
Note that when you saved it, it is displayed as an object.
Step.7
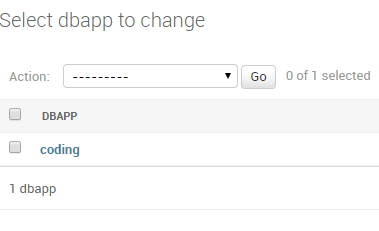
If you want your inputs to be displayed as text, you have to go to ‘models.py’ and add the following method to the Dbapp class.
def __str__(self):
    return self.text
Now, you can see the texts you added as texts themselves.
So, that’s how you insert some data into the database. Now let’s learn how to fetch data from the database and display them on an HTML page.
Step.8
Now, we are going to create a home page to display data from the database. So, let’s create a folder called ‘templates’ in the ‘dbproject’ folder.
Inside ‘templates’, create a file called ‘home.html’ and copy-paste the following code into it.
<!DOCTYPE html>
<html lang="en">
<head>
<meta charset="UTF-8">
<meta name="viewport" content="width=device-width, initial-scale=1.0">
<meta http-equiv="X-UA-Compatible" content="ie=edge">
<title>Django database tutorial</title>
<style>
@import url('https://fonts.googleapis.com/css?family=Lato');
body, html{
height: 100%;
background: #222222;
font-family: 'Lato', sans-serif;
}
.container{
display: block;
position: relative;
margin: 40px auto;
height: auto;
width: 500px;
padding: 20px;
}
h2 {
color: #AAAAAA;
}
.container ul{
list-style: none;
margin: 0;
padding: 0;
overflow: auto;
}
ul li{
color: #AAAAAA;
display: block;
position: relative;
float: left;
width: 100%;
height: 100px;
border-bottom: 1px solid #333;
}
ul li input[type=radio]{
position: absolute;
visibility: hidden;
}
ul li label{
display: block;
position: relative;
font-weight: 300;
font-size: 1.35em;
padding: 25px 25px 25px 80px;
margin: 10px auto;
height: 30px;
z-index: 9;
cursor: pointer;
-webkit-transition: all 0.25s linear;
}
ul li:hover label{
color: #FFFFFF;
}
ul li .check{
display: block;
position: absolute;
border: 5px solid #AAAAAA;
border-radius: 100%;
height: 25px;
width: 25px;
top: 30px;
left: 20px;
z-index: 5;
transition: border .25s linear;
-webkit-transition: border .25s linear;
}
ul li:hover .check {
border: 5px solid #FFFFFF;
}
ul li .check::before {
display: block;
position: absolute;
content: '';
border-radius: 100%;
height: 15px;
width: 15px;
top: 5px;
left: 5px;
margin: auto;
transition: background 0.25s linear;
-webkit-transition: background 0.25s linear;
}
input[type=radio]:checked ~ .check {
border: 5px solid #0DFF92;
}
input[type=radio]:checked ~ .check::before{
background: #0DFF92;
}
input[type=radio]:checked ~ label{
color: #0DFF92;
}
.signature {
margin: 10px auto;
padding: 10px 0;
width: 100%;
}
.signature p{
text-align: center;
font-family: Helvetica, Arial, Sans-Serif;
font-size: 0.85em;color: #AAAAAA;
}
.signature .much-heart{
display: inline-block;
position: relative;
margin: 0 4px;
height: 10px;
width: 10px;
background: #AC1D3F;
border-radius: 4px;
-ms-transform: rotate(45deg);
-webkit-transform: rotate(45deg);
transform: rotate(45deg);
}
.signature .much-heart::before,.signature .much-heart::after {
display: block;
content: '';
position: absolute;
margin: auto;
height: 10px;
width: 10px;
border-radius: 5px;
background: #AC1D3F;
top: -4px;
}
.signature .much-heart::after {
bottom: 0;top: auto;
left: -4px;
}
.signature a {
color: #AAAAAA;
text-decoration: none;
font-weight: bold;
}
</style>
</head>
<body>
<div class="container">
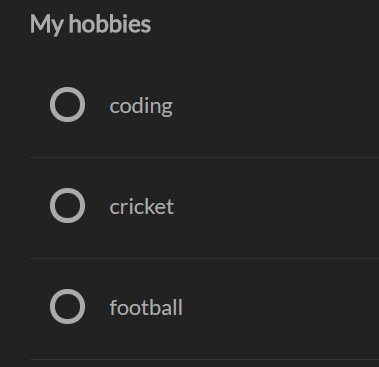
<h2>My hobbies</h2>
<ul> {% for c in object_list %}
<li> <input type="radio" id="f-option" name="selector">
<label for="f-option">{{ c }}</label> <div class="check"></div>
</li>
{% endfor %} </ul>
</div>
</body>
</html>Step.9
Next, we have to register the templates into ‘settings.py’. Add the DIR inside the TEMPLATES list.
'DIRS': [os.path.join(BASE_DIR, 'templates')],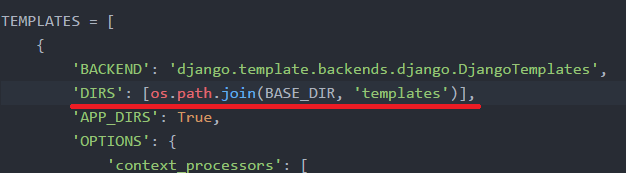
Don’t forget to put a space before ‘templates’, because I missed that space, and that caused me a lot of trouble while creating this tutorial.
Step.10
Go to ‘views.py’ and create a HomePageview.
from django.views.generic import ListView
from .models import Dbapp
class HomePageView(ListView):
    model = Dbapp
    template_name = 'home.html'
Step.11
Create a new file ‘urls.py’ inside the ‘dbapp’ folder. Add the following lines of code.
from django.urls import path
from . import views
urlpatterns = [
    path('',views.HomePageView.as_view(),name='home'),
]
Step.12
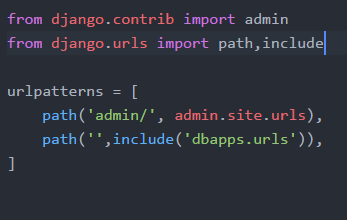
Go to ‘urls.py’ inside the ‘dbproject’ folder. Add the following lines of code.
path('',include('dbapps.urls'))Also, import the ‘include’ method from django.urls
Step.13
Now, it’s time to run your application. Go to your command line and navigate to the ‘dbproject’ folder. Run the server.
python manage.py runserverCopy the URL you get and paste that on a new tab. You will get the output that you have entered in the admin interface.
That’s it. Finally, you have completed the project. Woohoo!.
I hope you understood how data is inserted and fetched from the database in Django, and how to create models and views. You have also familiarized yourself with a super cool Django admin interface.
In case if you have any doubts, let me know in the comments section. Also, feel free to share this tutorial with your friends.
3 thoughts on “Django Database Tutorial (Illustrated Guide)”
Leave a Reply to Ashwin Joy Cancel reply
Recent Posts
Modular programming is a software design technique that emphasizes separating the functionality of a program into independent, interchangeable modules. In this tutorial, let's understand what modular...
While Flask provides the essentials to get a web application up and running, it doesn't force anything upon the developer. This means that many features aren't included in the core framework....

Bro your job is really awesome!, i would like to learn python to became a full stack developer could u help me please..
Thanks man.
Oh my goodness! an incredible article dude. Thank you Nonetheless I am experiencing problem with ur rss . Don’t know why Unable to subscribe to it. Is there anybody getting similar rss problem? Anybody who is aware of kindly respond. Thnkx